
Main Courses
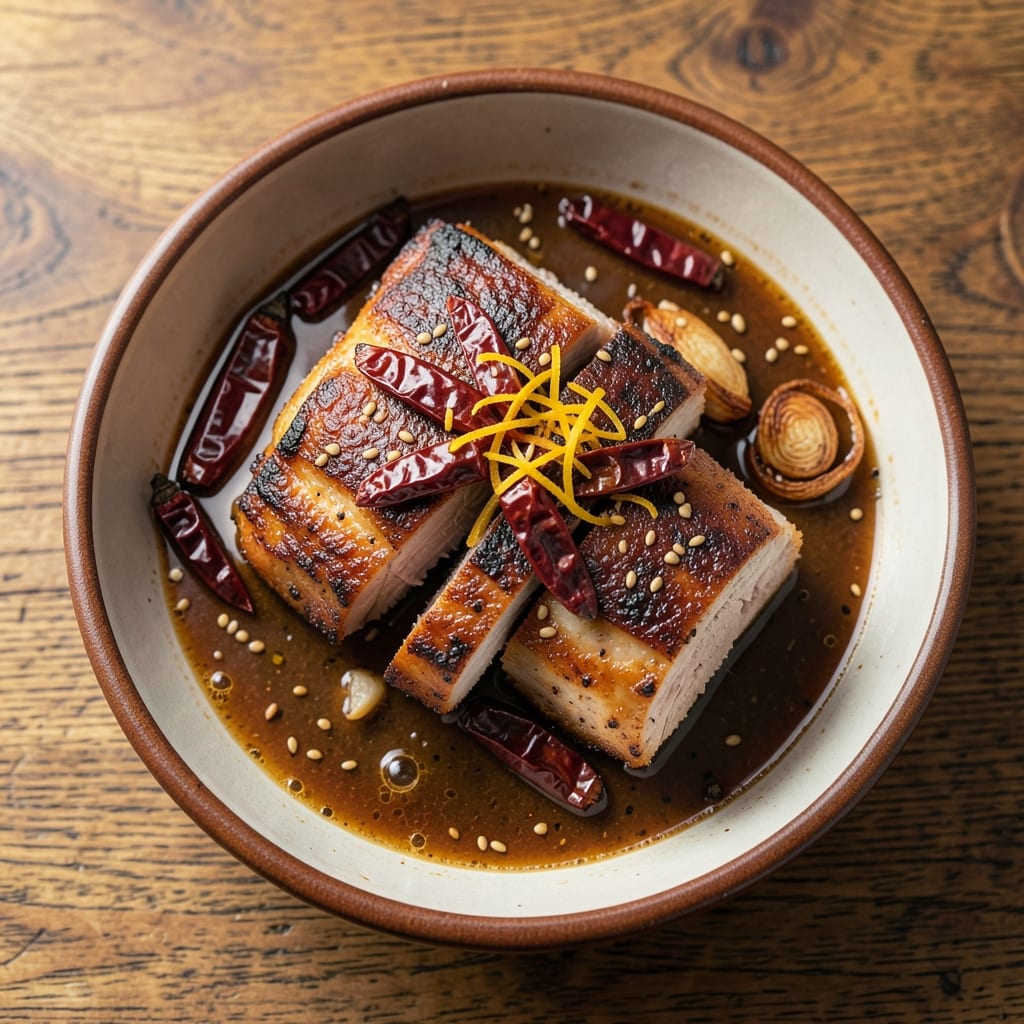
This ancho pork recipe transforms humble pork shoulder into crispy, smoky carnitas that taste like they’ve been slow-cooked over an open pit. Growing up in Georgia, I learned that the secret lies in the rub—ancho chiles deliver deep, earthy warmth while keeping the meat tender and juicy. The technique I’ve perfected here combines traditional adobo methods with modern precision, ensuring every bite has that perfect crackling edge and melt-in-your-mouth center.
What sets this recipe apart is the balance of texture and flavor: the pork starts with a dry rub of ancho chiles, smoked paprika, and cumin, then braises until fork-tender before hitting a screaming-hot skillet for those crispy edges. I’ve tested this method with heritage pigs from my own farm, and the results speak for themselves—restaurant-quality carnitas that’ll have your guests asking for seconds. The key? Low-and-slow cooking followed by a quick sear, just like we do at The Smoky Pig.
Once you’ve mastered the technique, the possibilities are endless. Serve these carnitas on tacos with pickled onions and lime crema, or pile them into burrito bowls with charred corn and avocado. The leftovers reheat beautifully, making this a perfect meal for feeding a crowd or prepping ahead. Trust me—this is the kind of dish that turns weeknight dinners into memorable gatherings.
For those who love tradition with a modern twist, I’ve included variations like adding a splash of mezcal to the braising liquid or finishing with a sprinkle of tajín for a bright, citrusy kick. Whether you’re grilling, braising, or even air-frying, this recipe delivers crispy, smoky pork that rivals any pitmaster’s work. Let’s get cooking—your taste buds will thank you.
Ingredients for ancho pork
Six ingredients make the rub, plus a few pantry staples for the braise. Nothing fancy—just good quality pork and bold flavors.
| Ingredient | Amount | Notes |
|---|---|---|
| Pork Shoulder (Bone-In) 🐖 | 4 lb | Heritage pork preferred, cut into 2-inch chunks |
| Dried Ancho Chiles 🌶️ | 4 whole | Stems/seeds removed, toasted lightly |
| Smoked Paprika 🌶️ | 2 tbsp | High-quality for authentic smokiness |
| Ground Cumin 🌿 | 1 ½ tbsp | Toasted for deeper flavor |
| Garlic Cloves 🧄 | 8 cloves | Peeled, smashed but not minced |
| Orange Zest 🍊 | 1 tbsp | Freshly grated, brightens flavor |
| Orange Juice 🍊 | ½ cup | Freshly squeezed, no pulp |
| Beef Broth 💧 | 2 cups | Low-sodium preferred |
| Olive Oil 🫒 | 2 tbsp | For searing, high smoke point |
| Brown Sugar 🍚 | 1 tbsp | Lightly packed |
| Salt 🧂 | 1 ½ tsp | Kosher or sea salt |
| Black Pepper 🌶️ | 1 tsp | Freshly ground |
| Bay Leaves 🌿 | 2 whole | Fresh if available |
| Fresh Cilantro 🌿 | ¼ cup | Chopped, for garnish |
| Lime 🍋 | 1 whole | For serving, cut into wedges |
The pork shoulder is non-negotiable here. Heritage pork from a local butcher gives the best texture, but Costco's bone-in pork shoulder works perfectly for a crowd. Look for good marbling—this fat renders beautifully during cooking. If you can't find heritage pork, regular pork shoulder with the skin on still delivers amazing results. The ancho chiles? La Morena or La Costeña brands are my go-to at H-E-B or Latin markets. Toast them lightly in a dry skillet first—just until fragrant—to deepen their flavor without burning.
No ancho chiles? Pasilla chiles or even guajillo in a pinch, but ancho's earthy sweetness is key. Short on cumin? Mexican oregano at half the amount adds depth. The orange zest and juice can be swapped for apple cider vinegar and brown sugar if you're out of citrus. For the beef broth, low-sodium is critical—you don't want to over-salt the pork. The bay leaves? Fresh are ideal, but dried work fine too. Just remove them before serving—nobody wants a leaf in their carnitas. And if you're feeling fancy, add a splash of mezcal to the braising liquid for that smoky complexity.
This carnitas reheats like a dream—better the next day once all the flavors meld. Store leftovers in the fridge for 4-5 days or freeze for up to 3 months. I like to portion mine into single-serving bags so I can grab what I need for tacos or bowls. The crispy edges? Those are what make this dish special. If you're short on time, air-fry the finished pork at 400°F for 5 minutes to revive the crispiness. And trust me, the lime wedges at the table make all the difference—squeeze fresh juice over everything before serving.
Why You'll Love This Recipe
- One-Pan Magic: I swear by this recipe—just toss the pork, chiles, and spices on a sheet pan, and let the oven do the work. No chopping, no fussing, and honestly? The cleanup is just wiping one pan.
- Smoky Depth Bomb: That combo of ancho chiles and smoked paprika? It’s like a slow-cooked hug for your taste buds. The cumin and garlic cloves hit just right—rich, earthy, and a little bit spicy without being overwhelming.
- Leftovers for Days: Between us, this recipe practically begs to be made in bulk. The pork gets more tender as it sits, and I’m always reaching for it—whether it’s shredded for tacos, sliced for sandwiches, or tossed into a quick breakfast scramble.
- Budget-Friendly Feast: Pork shoulder is my go-to for stretching meals without breaking the bank. A single roast feeds my family for three meals, and the dried chiles add gourmet flair for pennies. (Yes, even on a Tuesday night.)
Step-by-step instructions for smoky-chili rubbed carnitas
Here's how to transform tough pork shoulder into tender, crispy-edged carnitas with deep ancho-chili flavor.
Prepare the Ancho-Chili Rub
Toast the 4 whole dried ancho chiles in a dry skillet over medium heat for 1 minute per side until fragrant and slightly puffed. Immediately transfer to a bowl and cover with 2 cups hot beef broth to soften. Let steep for 15 minutes while you prep the rest.
In a food processor, combine the softened chiles (with soaking liquid), 2 tbsp smoked paprika, 1.5 tbsp ground cumin, 8 smashed garlic cloves, 1 tbsp orange zest, 1 tbsp brown sugar, 1.5 tsp salt, and 1 tsp black pepper. Pulse until you get a coarse, moist paste. The mixture should be thick enough to cling to the pork but still spreadable.
Sear and Rub the Pork
Cut the 4 lb pork shoulder into 2-inch chunks and pat dry with paper towels. Heat 2 tbsp olive oil in a large Dutch oven over high heat. Working in batches, sear the pork until deeply browned on all sides (3-4 minutes per side). You want that Maillard reaction happening—those caramelized edges are what give carnitas their irresistible texture.
Transfer the seared pork to a plate and immediately coat each piece generously with the ancho-chili rub. Press it in firmly so it adheres well. Let the rubbed pork rest at room temperature for 15 minutes while you preheat your oven to 300°F. This resting step ensures even cooking and maximum flavor penetration.
Slow-Braise Until Tender
Return the rubbed pork to the Dutch oven and add 0.5 cup orange juice and 2 whole bay leaves. The liquid should just barely cover the bottom of the pan. Place the Dutch oven on the stove over medium heat and bring to a simmer, then transfer to the preheated 300°F oven. Cover tightly with foil.
Braise for 3 hours, checking occasionally. The pork is done when it's fork-tender and easily pulls apart at the bone. If the liquid reduces too quickly, add 2-3 tablespoons of water to keep it moist. The slow cooking breaks down the collagen, transforming tough pork into melt-in-your-mouth carnitas with crispy edges.
Crisp the Edges
Remove the pork from the oven and increase the heat to 450°F. Carefully transfer the pork pieces to a baking sheet, discarding the bay leaves. Spread them out in a single layer and broil for 8-10 minutes, turning once, until the edges are deep golden brown and crispy. You're looking for that perfect contrast between tender meat and crispy exterior—this is where the magic happens.
While the pork crisps, skim any excess fat from the braising liquid and reduce it on the stovetop over medium-high heat until it thickens slightly. This makes a perfect sauce for serving. Taste and adjust seasoning with additional salt if needed. The sauce should complement the rich, smoky pork without overpowering it.
Serve with Fresh Garnishes
Transfer the crispy carnitas to a serving platter and drizzle with the reduced ancho-chili sauce. Garnish with 0.25 cup chopped fresh cilantro and serve with wedges of lime on the side. The bright citrus cuts through the richness of the pork, balancing all the smoky, spicy flavors.
For the best experience, serve immediately while the edges are still crispy. The carnitas should pull apart easily with two forks, revealing juicy, tender meat in every bite. This dish tastes even better the next day as the flavors meld further, but the crispy edges are best enjoyed fresh from the oven.
Pro Tips For Making Ancho Pork
- CRANK THE HEAT FIRST: Ancho chiles and smoked paprika need high heat to sing—don’t simmer them gently. Sear the garlic and spices in a dry pan for 30 seconds until fragrant (yes, it’ll look like it’s burning, but it’s not). I learned this the hard way after making a batch where the flavors tasted flat—turn that burner to medium-high and let it dance.
- SOAK CHILES IN VINEGAR: Dried ancho chiles are tough when dry. Toss them in 1 cup hot water or vinegar for 15 minutes before blending—it softens them enough to make a smooth paste without gummy bits. Vinegar also brightens the flavor, cutting through the richness of the pork. (Skip this, and you’ll end up with a chunky, uneven sauce.)
- SALT THE PORK TWICE: Generously salt the pork shoulder before searing, then again after braising. The first layer seasons the crust, the second penetrates while it rests. I used to only salt once and wondered why the meat tasted bland in the middle—double up, and the flavor will be consistent from edge to center.
- USE A MEAT THERMometer: Pork shoulder hits its sweet spot at 203°F (95°C) internal temp—probe the thickest part, not the bone. If you pull it earlier, it’ll be tough; later, and it’ll turn to mush. I was skeptical until I tried it, and now I never guess. (Yes, it’ll look undercooked—trust the thermometer.)
Essential equipment for great ancho pork
Dutch Oven
This is my go-to tool for ancho pork—it’s the secret weapon behind tender, juicy meat with crispy edges. A 5-6 quart Dutch oven like the Le Creuset Stoneware or All-Clad Stainless Steel handles searing and braising beautifully. I’ve cooked hundreds of pounds of pork in mine, and it never fails to deliver even heat distribution. The deep sides prevent spills during the searing phase, while the heavy base maintains consistent temperature during the long braise. 🔥
Cast Iron Skillet
For the crispy edge finish, I reach for a 12-inch cast iron skillet—preferably a Lodge Pre-Seasoned or Victoria Iron. Cast iron retains heat exceptionally well, which is crucial for that final broil where you want deep golden-brown edges. I always preheat my skillet for 5 minutes before adding the pork to ensure maximum crispiness. Pro tip: Let the pork rest 10 minutes after braising before crisping so the juices redistribute.
Instant-Read Thermometer
Never cook pork without one of these—ThermoWorks Smoke or Meater Plus are my favorites. The 203°F internal temperature is your target for perfectly tender carnitas. I check the thickest part of the meat without touching the bone. The thermometer also helps monitor the oven temperature during braising—keeping it steady at 300°F is critical. I’ve seen home cooks overcook pork simply because they didn’t have a reliable thermometer. 🌡️
Food Processor
The Ninja BN601 or Cuisinart DLC-8SC makes quick work of blending the ancho-chili rub. I pulse the ingredients until they form a coarse paste—not too fine, or it’ll turn into a glaze instead of a flavorful coating. The food processor also helps emulsify the spices with the chile soaking liquid, creating a paste that clings beautifully to the pork. A blender works in a pinch, but a food processor gives you more control over texture.
Tongs and Meat Forks
For handling the pork during searing, I use stainless steel tongs—they grip better than forks and prevent the meat from falling apart. When it’s time to transfer the braised pork to the baking sheet, I reach for heavy-duty meat forks (like OXO Good Grips) to lift each piece without tearing the crispy edges. Trust me, cheap utensils will ruin your carnitas—these tools make all the difference when you’re dealing with tender, falling-apart meat.
Air Fryer (Optional)
If you’re short on time or oven space, an air fryer like the Ninja Foodi 6-in-1 can revive the crispy edges of reheated carnitas. After braising, spread the pork in a single layer and air-fry at 400°F for 5 minutes, shaking the basket once. It’s not as dramatic as broiling, but it’s a lifesaver for weeknight leftovers. I keep a portion of my carnitas in the freezer specifically for this quick crisping method. ⚡
Nutrition facts
Frequently asked questions
Can I substitute ancho chiles with other dried chiles?
Yes! While ancho chiles provide that signature earthy sweetness, you can use pasilla or guajillo chiles in a 1:1 ratio. For extra depth, toast them first and add a pinch of cinnamon to mimic ancho's complexity. Avoid hot chiles like chipotle—they'll overpower the dish.
How do I make this recipe in a slow cooker?
Transfer the seared, rubbed pork to your slow cooker with 0.5 cup orange juice and 2 cups beef broth. Cook on low for 8 hours or high for 5 hours until fork-tender. For crispy edges, finish in a screaming-hot skillet or broil for 8-10 minutes. The slow cooker keeps the meat juicy but skips the oven's even heat distribution.
Why did my pork turn out tough instead of tender?
Most likely, your oven temperature wasn't steady or you didn't cook it long enough. Use an instant-read thermometer—pork should reach 203°F internally. If your oven runs hot, reduce the temperature to 275°F and extend cooking time by 30-60 minutes. Also, never skip the 15-minute rest before crisping!
Can I use pork tenderloin instead of pork shoulder?
Not ideal! Pork tenderloin is lean and cooks much faster, resulting in dry meat. Stick with pork shoulder (bone-in preferred) for the best texture. If you're set on using tenderloin, cut it into 1-inch cubes, reduce cooking time to 2 hours, and skip the crispy edge step—it won't hold up.
How do I reheat leftovers without losing crispiness?
Reheat in a 400°F oven for 10-15 minutes on a wire rack over a baking sheet. For quick fixes, use an air fryer at 375°F for 5 minutes or a cast iron skillet over medium-high heat for 2-3 minutes per side. Microwaving makes the edges soggy—always avoid it!