
Main Courses
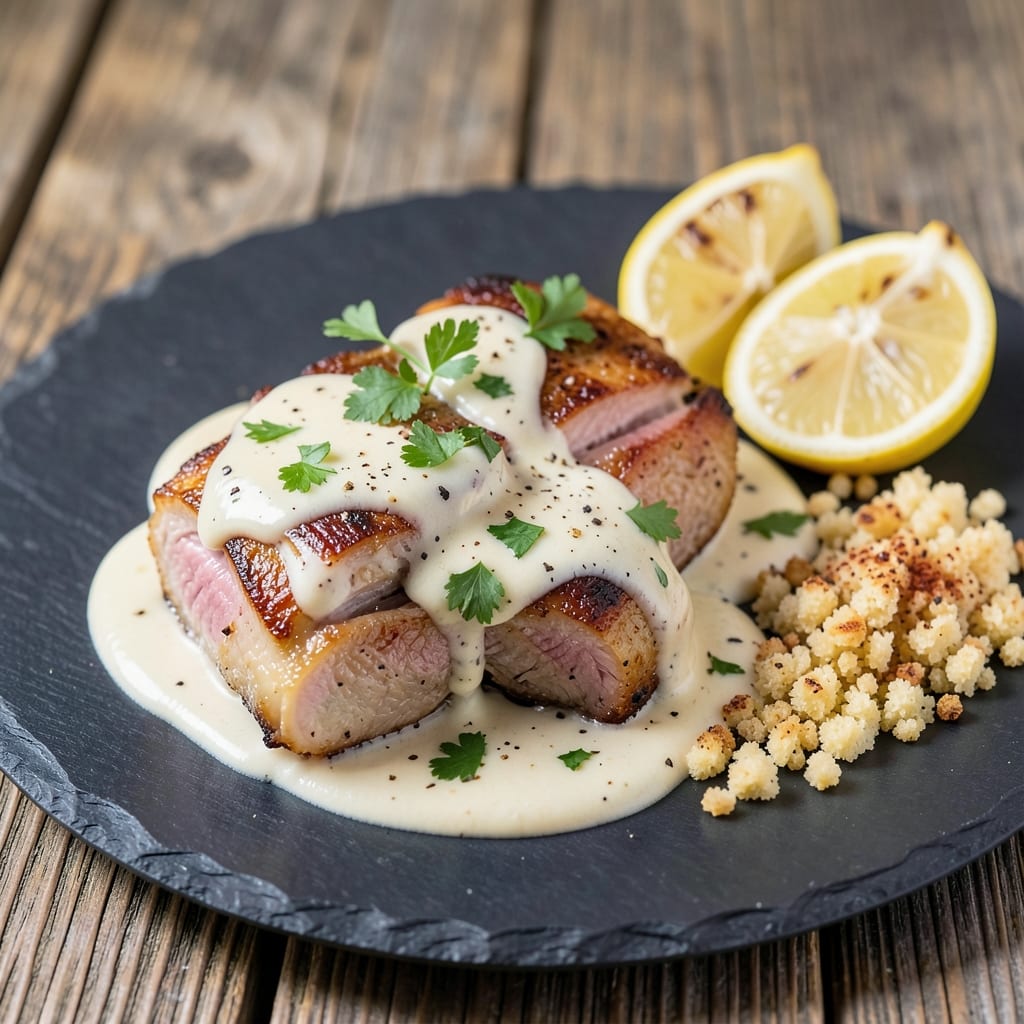
This angel pork chops recipe delivers the perfect balance of crispy edges and tender meat—just like my grandmother used to make in her Georgia kitchen. 🔥 The secret lies in a simple breading technique that creates a golden, shatteringly crisp crust while keeping the pork juicy inside. I've been perfecting this method for years, and it never fails to impress even the most skeptical eaters.
The process starts with a light seasoning of salt and pepper, followed by an egg wash that helps the breadcrumbs adhere perfectly. The chops are then coated in a mix of flour and cornstarch—this combination is key for achieving that signature crispy texture. Pan-searing in butter at the right temperature ensures the exterior gets golden brown while the meat stays moist and flavorful.
What you'll end up with is a plate of restaurant-quality pork chops that are crispy on the outside and tender on the inside, all while maintaining that classic angel pork chop profile. The garlic butter finish adds a rich, savory note that ties everything together beautifully. This dish is perfect for a comforting family dinner or a special occasion.
Serve with mashed potatoes, roasted vegetables, or a simple green salad to round out the meal. The technique is straightforward, but the results are undeniably impressive—just like the pork chops I grew up eating in my grandmother's kitchen. Let's get started!
Ingredients for angel pork chops
Pantry staples plus a few key ingredients for that signature crispy-tender magic.
| Ingredient | Amount | Notes |
|---|---|---|
| Pork Chops 🥩 | 4 pieces | Bone-in, 1-inch thick, center-cut |
| All-Purpose Flour 🌾 | ½ cup | For dredging and breading |
| Cornstarch 🌾 | ¼ cup | For extra crispiness |
| Large Eggs 🥚 | 2 whole | Room temperature, beaten |
| Fine Breadcrumbs 🍞 | 1 cup | Panko for extra crunch |
| Unsalted Butter 🧈 | ½ cup | For pan-searing |
| Garlic Cloves 🧄 | 4 cloves | Minced for garlic butter |
| Kosher Salt 🧂 | 1 ½ tsp | For seasoning |
| Ground Black Pepper 🌶️ | ½ tsp | Freshly ground |
| Fresh Parsley 🌿 | ¼ cup | Chopped, for garnish |
| Vegetable Oil 🫒 | 2 tbsp | For preheating pan |
| Lemon Juice 🍋 | 1 tbsp | Brightens flavor |
The pork chops are the star—look for center-cut, 1-inch thick pieces with good marbling for juiciness. I always grab mine from Costco when they're on sale, but your local butcher will have perfect ones too. Bone-in chops stay juicier than boneless, and the right thickness ensures even cooking. If you can't find center-cut, ask for a thick-cut pork loin chop—just trim any excess fat. The breading mix is where the magic happens: cornstarch gives that shatteringly crisp crust, while panko adds extra crunch. Skip the pre-seasoned breadcrumbs unless you want extra saltiness.
No panko? Regular breadcrumbs work fine—just toast them in a dry pan for 2 minutes first to enhance flavor. Short on cornstarch? Add an extra 2 tbsp flour to the mix, but don't skip it entirely—it's what makes these chops angel-worthy. Fresh parsley is ideal, but dried parsley at half the amount works in a pinch. The butter should be unsalted (you're controlling the seasoning), and European-style butter like Plugrá melts beautifully. For the garlic butter, roasted garlic adds a sweeter depth if you're feeling fancy. And if you don't have lemon juice? A splash of white wine vinegar does the trick.
These chops reheat beautifully—just pop them in a 350°F oven for 8-10 minutes with a splash of butter. Store leftovers in an airtight container for up to 3 days in the fridge, or freeze for 2 months. I always make a double batch because they disappear fast. The breading gets soggy if you stack them, so keep them separate in the fridge. For serving, a squeeze of lemon right before eating keeps everything fresh. Trust me, the first bite is worth every crispy edge.
Why You'll Love This Recipe
- Fewer Ingredients, More Magic: I swear by this recipe because it’s the kind of dish where you don’t need a pantry full of spices—just flour, cornstarch, eggs, and breadcrumbs. That crispy, golden crust? Pure satisfaction from three simple steps.
- Crispy-Creamy Perfection: The cornstarch in the flour mix gives these chops that shatteringly crispy exterior while keeping the inside juicy. Honestly, it’s the kind of texture that makes you pause mid-bite—like biting into a cloud with a cracker shell.
- Weeknight Hero: Between us, this is my go-to when I’m too tired to fuss. Toss them in the oven while I chop veggies or throw together a salad—no babysitting required. (Yes, even on a Tuesday night.)
- Budget-Friendly Feast: Pork chops stretch further than you’d think, and the ingredients cost next to nothing. I’ve fed four people for under $15 with leftovers that reheat beautifully. That’s dinner covered.
Step-by-step instructions for angel pork chops with crispy edges
Here's how to get that perfect golden crust and tender interior every time.
👨🍳 Step 1: Prep the Pork Chops for Maximum Crispiness
Pat the 4 pieces Pork Chops completely dry with paper towels—this is non-negotiable for crispy breading. I like to press down firmly on each chop to remove all moisture from the surface. Season both sides generously with 1.5 tsp Kosher Salt and 0.5 tsp Ground Black Pepper, rubbing it in so it sticks to the meat.
In a shallow bowl, whisk together the 0.5 cup All-Purpose Flour and 0.25 cup Cornstarch. This flour-cornstarch mix creates that signature crispy texture angel pork chops are known for. I always use a wide, shallow bowl so the chops can sit flat without absorbing too much mixture.
🍳 Step 2: Create the Perfect Breading Station
Set up three bowls in order: one with the flour-cornstarch mix, one with the 2 whole Large Eggs beaten until smooth (no streaks), and one with the 1 cup Fine Breadcrumbs. I keep them close together so I can work quickly without letting the chops sit too long between steps—this prevents soggy breading.
Dip each seasoned pork chop into the flour mixture, pressing gently to coat evenly. Shake off any excess, then dip into the egg wash, letting any excess drip off. Finally, press the chop into the breadcrumbs, covering all sides completely. You should see golden breadcrumbs clinging to the meat—this is what creates that perfect crunch.
🔥 Step 3: Pan-Sear for Golden Perfection
Heat 2 tbsp Vegetable Oil in a large skillet over medium-high heat until shimmering. You want the oil hot enough that when you drop in a breaded chop, it sizzles immediately. Add the chops and cook for 3-4 minutes per side until they're deep golden brown and the breading is crispy. Don't move them around—let them develop that beautiful crust.
I press down gently on the chops during the first minute to prevent them from curling and ensure even contact with the pan. If the breading starts to brown too quickly before the center is cooked, reduce the heat slightly to medium for the last minute of cooking. The internal temperature should reach 145°F when measured with a meat thermometer.
🥘 Step 4: Make the Garlic Butter Sauce
While the chops rest (they'll need 5 minutes to carryover cook), melt 0.5 cup Unsalted Butter in the same skillet over medium heat. Add the 4 cloves Garlic Cloves that have been minced and cook for 30 seconds until fragrant but not browned. Immediately remove from heat and stir in 1 tbsp Lemon Juice—this brightens the whole dish.
Here's the thing—don't let the garlic burn. It happens faster than you think, and once it's browned, it turns bitter. The lemon juice also helps balance the richness of the butter, giving that signature "angel" flavor these chops are named for.
🍽️ Step 5: Finish and Serve with Herb Garnish
Return the chops to the skillet with the garlic butter sauce, spooning the sauce over the top. Let them sit for 1-2 minutes so they soak up all that flavor. Transfer to a serving platter and sprinkle generously with 0.25 cup Fresh Parsley just before serving—this adds a fresh pop of color and brightness.
Serve immediately with lemon wedges on the side. The chops should have a crispy, golden exterior that gives way to tender, juicy meat inside. Each bite should deliver that perfect balance of crunch, garlic butter richness, and bright lemon finish—just like your favorite restaurant version.
Pro Tips For Making Angel Pork Chops
- CRANK THE HEAT FIRST: Angel pork chops need that initial sear to lock in moisture and build the crust. I used to start medium—big mistake. Get your pan screaming hot before adding oil, then lay those chops down flat. They’ll hiss like a science experiment, but that’s how you guarantee a golden finish, not a sad, pale coating.
- MIX CORNSTARCH WITH FLOUR: That extra cornstarch isn’t just fluff—it’s the difference between a dry bite and a tender, crispy crust. Skip the pre-mixing? You’ll regret it. Toss 2 tablespoons cornstarch with your flour and egg wash before dredging. The starch absorbs moisture and creates a lighter, almost powdery coating that browns like a dream.
- PAT DRY, DON’T RUB: Wet pork chops are the enemy of crispy breading. I learned this after slapping chops straight from the fridge into the flour—resulting in a soggy mess. Grab paper towels and press firmly (not wipe like you’re polishing silver) to dry every surface. The breadcrumbs will cling like they’re supposed to, not slide off halfway through frying.
- REST CHOPS BEFORE SLICING: Cutting into angel pork chops too soon is how you turn a perfect dish into a juicy disaster. Let them sit under foil for 5 minutes after frying—yes, even if you’re starving. The meat redistributes, and that breading stays intact. I know, I know—waiting kills you. But one bite of that juicy, unbroken crust makes it worth it.
Perfect pairings for angel pork chops
Classic Southern Sides
Angel pork chops shine with traditional Southern sides that complement their crispy edges. I always serve them with creamy mashed potatoes—whipped with sour cream and chives—because the cool creaminess balances the richness. For a heartier option, cornbread (made with sharp cheddar and jalapeños) adds a sweet, crunchy contrast. Both sides soak up the garlic butter sauce beautifully, making every bite even more delicious. 🥔
Fresh Green Salads
A crisp arugula salad with shaved fennel, toasted walnuts, and lemon vinaigrette cuts through the richness perfectly. The peppery arugula and bright lemon refresh your palate between each crispy bite. For a lighter option, try a cucumber and tomato salad with red onion and fresh dill—the cool cucumbers provide a refreshing counterpoint to the warm chops. I like to add a pinch of flaky sea salt to enhance the flavors.
Herb-Infused Vegetables
Roasted green beans with garlic and thyme are my go-to vegetable side. Toss 1 lb fresh green beans with 2 tbsp olive oil, 3 minced garlic cloves, 1 tsp dried thyme, ½ tsp salt, and ¼ tsp black pepper, then roast at 425°F for 15-18 minutes until crisp-tender. The garlic ties into the pork chops' flavor profile beautifully. Another favorite is sautéed spinach with garlic and lemon, which adds a vibrant green element to the plate.
Beverage Pairings
For drinks, a crisp white wine like Sauvignon Blanc from New Zealand or Pinot Grigio from Italy pairs perfectly with the dish. The acidity in these wines cuts through the richness of the butter and pork. If you prefer beer, a light lager like Peroni or Heineken works well—its clean, crisp profile complements the crispy texture without overpowering it. For a non-alcoholic option, sparkling lemonade with a splash of Earl Grey tea adds a refreshing twist.
Make-Ahead Sauces
Prep the garlic butter sauce ahead of time to save effort on serving day. Melt ½ cup butter, add 4 minced garlic cloves, and cook for 30 seconds—then stir in 1 tbsp lemon juice and let it cool. Store in an airtight container in the fridge for up to 3 days. Reheat gently in the microwave or stovetop before serving. This way, you only need to warm the sauce when ready to plate, keeping the chops crispy. ✨
Nutrition facts
Frequently asked questions
Why do you call these "angel" pork chops?
The name comes from the crispy, golden breading that looks like angel wings when sliced—light and delicate yet sturdy enough to hold its shape. This classic Southern technique creates a perfect balance of crunch and tenderness, making them feel like a special treat. The dish has been a staple in family kitchens for generations, earning its heavenly nickname.
Can I use boneless pork chops instead of bone-in?
Yes, but boneless chops cook faster and may dry out more easily. If using boneless, select ½-inch thick chops and reduce cooking time to 2-3 minutes per side. For extra moisture, add a splash of chicken broth to the pan while searing. The breading technique remains the same—just monitor the internal temperature closely to reach 145°F.
What's the secret to keeping the breading crispy?
Three key factors: dry meat, hot pan, and no crowding. Pat chops completely dry before breading, and use a skillet large enough to fit them without overlapping. Cook over medium-high heat until deep golden brown—don't move them too soon! The cornstarch in the breading mix is what creates that signature shatteringly crisp texture.
Can I bake these instead of pan-searing?
Preheat oven to 425°F, place breaded chops on a wire rack over a baking sheet, and bake for 12-15 minutes, flipping halfway. For extra crispiness, broil for 1-2 minutes at the end. The oven method works well for larger batches, though pan-searing gives the best caramelization. Use the same internal temperature guideline of 145°F.
How do I fix soggy breading?
Soggy breading usually means the chops were cooked too slowly or the pan wasn't hot enough. For future attempts, ensure your pan is smoking hot before adding oil, and cook over medium-high heat the entire time. If you've already made them, try reheating in a 400°F oven for 5-7 minutes**—the dry heat will crisp up the breading. For extra insurance, store chops uncovered in the fridge to let moisture evaporate before reheating.