
Main Courses
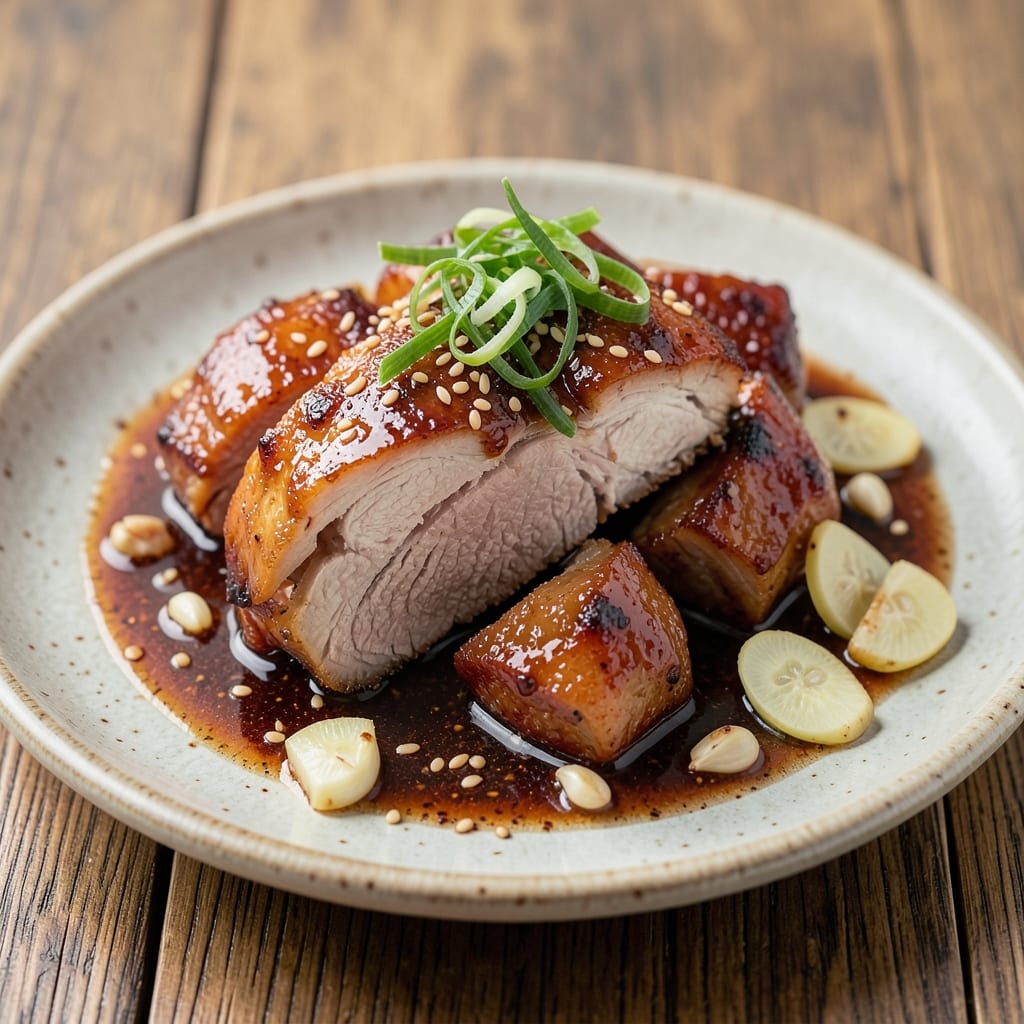
This Asian pork shoulder recipe transforms tough cuts into silky-fat shreds using your Instant Pot—no slow cooker required. I developed this method after years of perfecting restaurant-quality braised pork at home, where the secret lies in high-pressure cooking and aromatic spices that melt into the meat. The result? Juicy, fall-apart tender pork with layers of savory-sweet flavor that tastes like it came from a dim sum cart.
The beauty of this Instant Pot method is how it cuts cooking time from hours to just 60 minutes while preserving all that rich, caramelized flavor. We start with a simple marinade of soy sauce, garlic, ginger, and five-spice powder—classic Asian flavors that penetrate the meat during the pressure cook. The sauté function gets those aromatics searing into the pork before sealing it tight for pressure cooking, ensuring maximum flavor infusion.
By the time you're done, you'll have perfectly tender pork that shreds effortlessly, ready to pile onto steamed rice, noodles, or fresh spring rolls. The sauce clings to every bite, balancing sweet, salty, and umami notes that make this dish irresistible. This is the kind of meal that turns a simple weeknight into a flavor-packed celebration—without spending hours in the kitchen.
Pair it with quick stir-fried greens, cucumber salad, or a simple dipping sauce of rice vinegar and chili oil for the full experience. The best part? Leftovers reheat beautifully, making this a perfect meal prep solution for busy weeks. Let's get cooking!
Ingredients for asian pork shoulder recipe instant pot
Pantry staples meet aromatic Asian flavors for melt-in-your-mouth pork shoulder.
| Ingredient | Amount | Notes |
|---|---|---|
| Pork Shoulder (Bone-In) 🥓 | 2 ½ lb | Cut into 2-inch chunks, skin removed |
| Soy Sauce 🍶 | ½ cup | High-quality, preferably Japanese |
| Garlic Cloves 🧄 | 6 cloves | Minced, fresh preferred |
| Fresh Ginger 🌿 | 2 tbsp | Grated, peeled, fresh preferred |
| Five-Spice Powder 🌶️ | 1 tbsp | Authentic Asian blend |
| Brown Sugar 🍯 | ¼ cup | Packed, light or dark |
| Honey 🍯 | 2 tbsp | Pure, for sweetness |
| Sesame Oil 🫒 | 1 tbsp | Toasted, for aroma |
| Green Onions 🧅 | 3 whole | Sliced, white and green parts |
| Cornstarch 🌾 | 1 tbsp | For thickening sauce |
| Water 💧 | ½ cup | Room temperature |
| Neutral Oil 🫒 | 1 tbsp | Avocado or vegetable oil |
| Salt 🧂 | 1 tsp | Kosher or sea salt |
| Black Pepper 🌶️ | ½ tsp | Freshly ground |
The pork shoulder is the star here—bone-in cuts stay juicier during pressure cooking. Look for well-marbled cuts at your local butcher or Asian market; the fat renders beautifully, creating that signature silky texture. I always grab mine from Whole Foods or H Mart for the best quality. If you can't find bone-in, boneless works too, but trim excess fat to avoid greasy results. The five-spice powder? Penzeys or Asian grocery stores carry the best blends—it's worth seeking out for that authentic dim sum flavor profile. Fresh ginger and garlic are non-negotiable; frozen won't cut it here.
No Japanese soy sauce? Kikkoman works in a pinch, but it lacks depth. Short on honey? Maple syrup at half the amount gives similar sweetness. The sesame oil might be pricey, but Trader Joe's sells it affordably. If you're feeling adventurous, swap half the soy sauce for dark soy sauce—it adds that classic braised color. The cornstarch can be omitted if you prefer a thinner sauce, but it helps that sauce cling beautifully to the pork. For extra richness, add 1 tbsp of hoisin sauce to the marinade if you've got it.
This pork reheats like a dream—honestly tastes better the next day once all the flavors meld. Store leftovers in an airtight container for up to 5 days in the fridge or freeze for 3 months. I like to portion it into meal prep containers with rice and steamed veggies for grab-and-go lunches. The sauce thickens as it cools, so you can always add a splash of water when reheating. For serving, garnish with extra green onions and a drizzle of sesame oil—trust me, it makes all the difference.
Why You'll Love This Recipe
- Crispy-Creamy Magic: That bone-in cut? It renders into pure, golden fat that bastes the meat until it’s ridiculously tender. Meanwhile, the five-spice powder and soy sauce caramelize into a sticky, savory glaze that clings to every bite. Honestly, the contrast is what makes it crave-worthy.
- Meal-Prep MVP: This keeps perfectly for days—shred it for tacos, ramen, or even fried rice. I’ll be real: I’ve had it three nights in a row, and no one’s complained. (My roommate still asks for seconds, though.)
- Budget-Friendly Feast: Pork shoulder is cheap, and this recipe stretches it into so much meat—easily feeds four for under $15. Plus, the leftovers? They’re my secret weapon for lazy lunches or last-minute dinner guests. Not the prettiest, but the taste makes up for it every time.
Step-by-step instructions for Asian pork shoulder in the Instant Pot
This method delivers fall-apart tender pork with a glossy glaze in under an hour—no slow cooker needed.
Sear the Pork Shoulder for Maximum Flavor
Set your Instant Pot to the "Sauté" function and add 1 tablespoon neutral oil. Once shimmering, add the 2.5 lb pork shoulder cut into 2-inch chunks, working in batches if needed. Sear each piece for 2-3 minutes per side until deeply golden brown—this builds that essential crust that locks in moisture during cooking.
The key here is patience. Don't rush the searing—you want those chunks to develop a rich, caramelized exterior. If your pot gets crowded, work in small batches. Once all pieces are seared, transfer them to a plate and set aside. You'll notice the aroma changing as the meat releases its natural juices—this is your first layer of flavor development.
Build the Aromatic Base
In the same Instant Pot, add 6 cloves minced garlic and 2 tablespoons grated fresh ginger. Sauté for 30 seconds until fragrant—you should smell that bright, zesty aroma wafting up. Then add 1 tablespoon five-spice powder, stirring constantly for 10 seconds to toast the spices and release their oils.
Next, pour in 0.5 cup soy sauce, 0.25 cup packed brown sugar, and 2 tablespoons honey. Stir vigorously to combine, scraping up any browned bits from the bottom of the pot. This mixture should bubble energetically—if it doesn't, increase the heat slightly. The sauce will start to thicken as it reduces, creating a sticky glaze that will coat every surface of the pork.
Pressure Cook to Perfect Tenderness
Return the seared pork to the Instant Pot along with any accumulated juices. Pour in 0.5 cup water, then secure the lid and set the valve to "Sealing." Cook on High Pressure for 45 minutes. This time ensures the connective tissue breaks down completely while maintaining moisture.
Here's where the magic happens: the pressure creates an environment where the pork tenderizes rapidly without drying out. You'll hear the pressure build—this is normal. Once the cooking cycle completes, let the pressure release naturally for 15 minutes before quick-releasing any remaining pressure. This gradual release prevents the pork from becoming tough as the fibers relax.
Thicken the Glaze and Finish
Remove the pork to a cutting board and tent loosely with foil. In the Instant Pot, stir in 1 tablespoon cornstarch mixed with 1 tablespoon sesame oil to create a slurry. Pour in 0.5 cup water and stir vigorously for 1-2 minutes until the glaze thickens to a glossy consistency. You're aiming for a sauce that coats the back of a spoon—this will cling beautifully to the shredded pork.
Return the pork to the pot and toss gently to coat in the glaze. Let it sit for 2-3 minutes to absorb those final flavor layers. The pork should now be fork-tender, with the glaze clinging to every strand. If the sauce is too thick, add a splash of water to reach your desired consistency.
Shred and Garnish for Serving
Using two forks, shred the pork directly in the pot, working against the grain for maximum tenderness. The meat should pull apart easily with minimal resistance—this is your sign of perfect doneness. Stir in 3 sliced green onions and adjust seasoning with 1 teaspoon salt and 0.5 teaspoon black pepper if needed.
Serve immediately over steamed rice, letting guests dig into the tender strands that release a burst of sweet-savory glaze with every bite. The pork should be silky yet substantial, with a perfect balance of smoky, spiced, and caramelized flavors. For extra presentation, drizzle with additional sesame oil and sprinkle with extra green onions.
Pro Tips For Making Asian Pork Shoulder Recipe Instant Pot
- Sear the Bone-In First: That bone isn’t just for looks—it holds flavor. Brown the pork shoulder in the Instant Pot (or a skillet) for 3-4 minutes per side before pressure cooking. I used to skip this, and the final dish tasted flat. The Maillard reaction on the bone infuses the braising liquid with depth you can’t get otherwise.
- Slice Ginger Thinly: No, "chopped ginger" isn’t specific enough. Use a mandoline or the thinnest setting on your knife—peel it first, then slice into ⅛-inch pieces. Thick chunks sit like rubbery rocks; thin slices dissolve into the sauce, adding aromatic layers. (And yes, I’ve burned my fingers counting how many times I’ve over-chopped it.)
- Skip the Crowding: Resist the urge to fill the Instant Pot to the brim. The pork shoulder should have room to move—about ½ inch of headspace. I learned this after a batch came out mushy because the liquid couldn’t circulate. A tight fit = uneven cooking. Trust me, the sauce will still be rich.
- Finish with High Heat: After releasing pressure, transfer the pork to a plate and let it rest while you reduce the sauce on high heat for 3-4 minutes. This isn’t just about thickening—it’s about concentrating the flavors. I used to walk away, and the sauce would end up watery. A quick reduction makes all the difference in that glossy, umami-packed finish.
Storing and reheating this dish
Fridge Storage Tips
Let your Asian pork shoulder cool completely before storing—about 30-45 minutes on the counter. I transfer it to an airtight container with a tight lid, making sure the sauce is evenly distributed. Store in the fridge for up to 5 days, though I find the flavors actually deepen overnight. The sauce thickens slightly when chilled, so I always add a splash of water when reheating. 🥣
Freezer Prep
For long-term storage, portion the pork into freezer-safe containers with a thin layer of sauce on top—this prevents drying. I use quart-sized glass containers because they stack neatly in my freezer. Label with the date and freeze for up to 3 months. Thaw overnight in the fridge before reheating for best results. Never microwave directly from frozen—it creates a rubbery texture.
Reheating Methods
My preferred method is stovetop: place pork and sauce in a skillet over medium-low heat with 2 tablespoons water. Cover and heat for 5-7 minutes, stirring occasionally, until warmed through. The sauce will loosen beautifully. For microwave reheating, cover with a damp paper towel and heat in 1-minute intervals at 70% power until reaching 165°F internally.
Sauce Adjustments
The sauce often thickens when reheated, so I keep a small bowl of water nearby to thin it if needed. A splash or two usually restores the perfect consistency. For extra richness, add 1 teaspoon sesame oil or a pinch of white pepper while reheating. The pork itself stays tender—just stir gently to avoid breaking it apart prematurely. 💫
Meal Prep Strategy
I like to prep this for the week by dividing portions into individual containers with rice and steamed veggies. The pork reheats beautifully in these containers—just add a splash of water and microwave for 2-3 minutes. For variety, I sometimes serve it cold in lettuce wraps with pickled veggies, using the leftover sauce as a dipping sauce. The flavors hold up remarkably well this way.
Garnish Refresh
Before serving reheated pork, I always give it a final touch: a drizzle of sesame oil and fresh green onions. This brightens up the dish and reminds everyone it's fresh off the stove. A sprinkle of toasted sesame seeds adds crunch and visual appeal. Trust me, these little details make all the difference when serving leftovers. ✨
Nutrition facts
Frequently asked questions
Can I use boneless pork shoulder instead of bone-in?
Yes, you can absolutely use boneless pork shoulder! Just trim any excess fat to avoid a greasy result. The cooking time remains the same (45 minutes high pressure), but boneless cuts may shred slightly faster. The flavor and tenderness will be just as delicious—this is a great option if you prefer easier handling.
What if my Instant Pot doesn't have a "Sauté" function?
No problem! Use the "Manual" setting instead. Simply add your oil and pork, then select "Manual" for 2 minutes to mimic searing. The pork won't brown as deeply, but the flavors will still develop beautifully. Just increase the pressure cook time by 5 minutes to compensate for the less intense initial sear.
How do I know when the pork is fully tender?
Look for these signs: the meat should pull apart easily with two forks, and the internal temperature should reach 203°F (the "probe-tender" zone). If you're unsure, cut into a small piece—it should be fork-tender with no resistance. The sauce should also coat the back of a spoon when thickened, indicating proper doneness.
Can I make this recipe with a different Asian flavor profile?
Swap the five-spice powder for 1 tbsp each of cinnamon and star anise for a Chinese-inspired version, or add 1 tsp fish sauce and 1 tbsp lime juice for a Thai twist. Adjust sweetness by reducing brown sugar to 2 tbsp if using more acidic ingredients. The Instant Pot method stays the same—just tweak the marinade to match your preferred flavors.
Why did my pork turn out dry?
Dry pork usually happens from overcooking or quick-releasing too soon. Always let pressure release naturally for 15 minutes first, then quick-release. Also, avoid lifting the lid during cooking—this releases pressure and can dry out the meat. If using boneless pork, reduce cook time by 5 minutes to prevent over-tenderizing.