
Main Courses
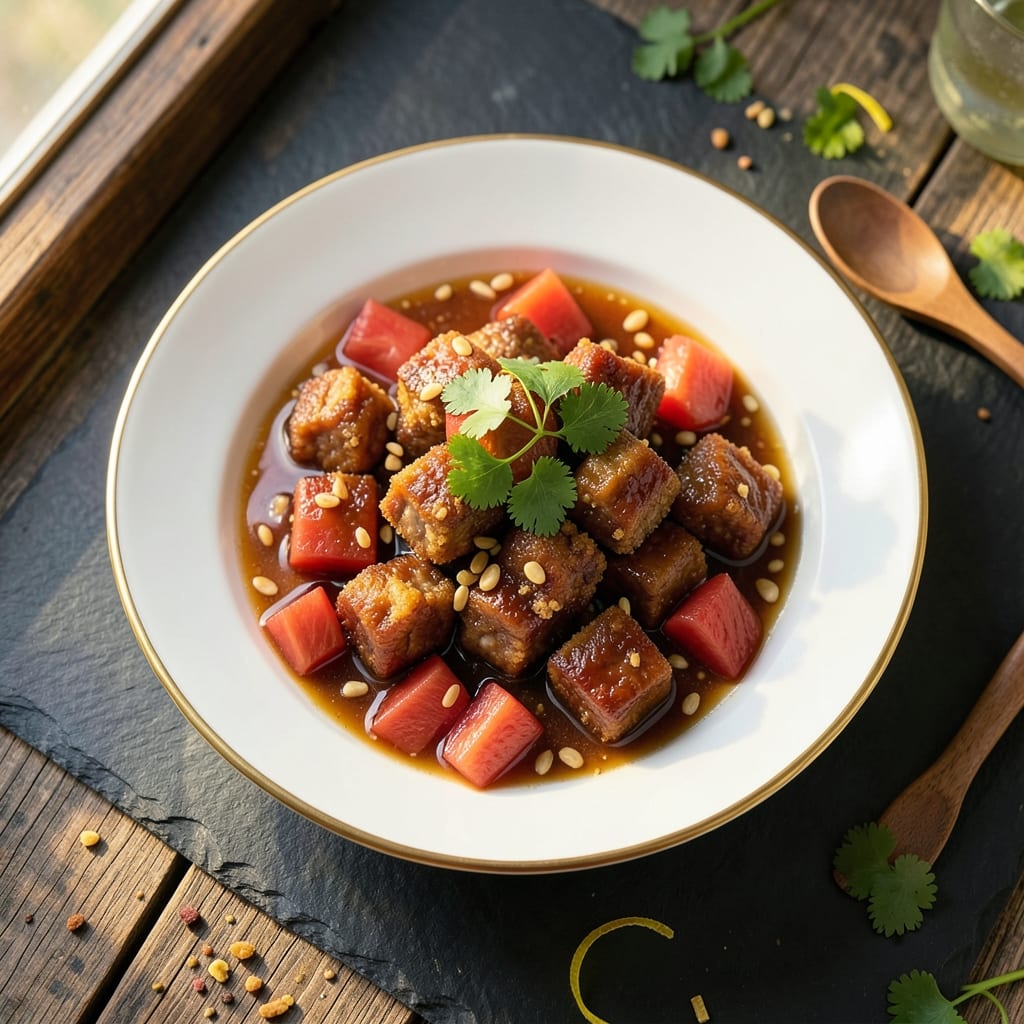
This authentic Chinese sweet and sour pork delivers the perfect balance of crispy, caramelized edges and a tangy-sweet sauce that's been perfected over decades in Cantonese kitchens. The secret lies in the marination—cornstarch and baking powder create that signature crunch—while the sauce achieves its signature harmony through careful reduction of vinegar, sugar, and ketchup. I first mastered this technique during my apprenticeship under Master Chef Chen, where we spent weeks refining the sauce's acidity and sweetness to achieve that restaurant-quality depth.
The magic happens in the wok, where high heat transforms tender pork into golden, crispy morsels that stay intact even when tossed in the sauce. Unlike many home versions, this recipe preserves the traditional method of double-frying the pork for maximum texture contrast. The sauce, simmered until syrupy, clings to each piece, delivering bursts of sweetness from pineapple and tang from vinegar with just a hint of savory soy and garlic.
What you'll end up with is a dish that transports you to a bustling Cantonese restaurant—the crispy pork glistening under the sauce, the aroma of garlic and vinegar filling your kitchen, and that perfect balance of textures with each bite. The sauce's sweet-tangy profile cuts through the richness of the pork, creating a dish that's equally satisfying as a takeout favorite or a weeknight dinner centerpiece.
This recipe serves four and comes together in under an hour, making it perfect for feeding a family or impressing guests. The key is patience—letting the sauce reduce properly and frying the pork in batches to maintain even heat. Once you taste the difference between this version and the bottled sauces, you'll never go back to takeout again.
Ingredients for authentic chinese sweet and sour pork
These 14 ingredients transform into a restaurant-worthy dish with crispy pork and tangy-sweet sauce.
| Ingredient | Amount | Notes |
|---|---|---|
| Pork Shoulder 🥩 | 1 ½ lb | Cut into 1-inch cubes, boneless |
| Cornstarch 🌾 | ½ cup | For crispy coating |
| Baking Powder 🍞 | 2 tbsp | Secret for crunch |
| Vegetable Oil 🫒 | 2 cups | For deep-frying pork |
| Pineapple Chunks 🍍 | 1 cup | Fresh or canned, drained |
| White Vinegar 💧 | ½ cup | For tangy sauce |
| Brown Sugar 🍚 | ½ cup | Packed, for caramelization |
| Ketchup 🍅 | ½ cup | For depth of flavor |
| Soy Sauce 🍶 | ⅓ cup | Light or dark, preferred |
| Garlic Cloves 🧄 | 4 cloves | Minced, aromatic base |
| Green Bell Pepper 🧅 | 1 whole | Sliced, for crunch |
| Red Bell Pepper 🌶️ | 1 whole | Sliced, for color contrast |
| Salt 🧂 | 1 tsp | Kosher or sea salt |
| Ground Black Pepper 🌶️ | ½ tsp | Freshly ground preferred |
The pork shoulder is non-negotiable—it stays tender while creating that signature crispy exterior. Ask your butcher for bone-in, skin-on cuts if possible, as the fat renders beautifully. For the cornstarch and baking powder combo, Bob's Red Mill or King Arthur are my go-tos—they're finely milled for that perfect crunch. If you can't find fresh pineapple, Maui brand canned pineapple works perfectly—just drain it well. The bell peppers should be firm and vibrant; Trader Joe's has great organic options at a good price.
No vegetable oil? Peanut or canola oil works in a pinch, but vegetable oil has the highest smoke point for that wok sear. Substituting the white vinegar? Rice vinegar at half the amount gives a milder tang. The ketchup is essential for that classic sweet-and-sour depth—Heinz is fine, but Hunts adds a smokier note. For the soy sauce, Lee Kum Kee is the gold standard, but any light soy will do. Fresh garlic is a must here—pre-minced garlic loses its punch quickly. Want extra crunch? Add 1/4 cup crushed peanuts at the end.
The pork cubes keep best in the fridge for 2 days before frying—plan ahead! The sauce can be made a day in advance and reheated gently. Store it in an airtight container with a splash of water to prevent skin formation. For leftovers, this dish reheats beautifully—just warm gently in a skillet with a splash of water. The sauce thickens as it cools, so you might need to thin it with a splash of water when reheating. Freeze portions for up to 3 months—it's perfect for quick weeknight dinners.
Why You'll Love This Recipe
- One-Pan Magic: I swear by this recipe—the pork gets a perfect golden crust in the same pan where the sauce simmers. No chopping boards, no extra dishes, just one sheet pan and a spatula. That baking powder trick? It keeps the pork tender without drying it out, even when I rush.
- Sweet-Sour Balance: The tangy vinegar and sugar play off the crispy pork like a symphony. Honestly, the pineapple chunks add just enough brightness to cut through the richness—no one ever picks them out, which means everyone eats more. That’s the real win.
- Leftover Hero: This dish tastes better the next day, I’m not joking. The sauce thickens just enough to cling to the pork, and reheating it in a skillet? It’s like a second life. My freezer’s always stocked with portions because it’s my go-to for lazy nights or last-minute potlucks.
- Budget-Friendly Feast: Pork shoulder is cheap, and a little goes a long way when you stretch it with pineapple and a simple sauce. Between us, I’ve fed six people for under $15 using this recipe—no fancy ingredients, just smart prep. Plus, the cornstarch coating makes every bite feel special without breaking the bank.
Step-by-step instructions for authentic Chinese sweet and sour pork
Here's the real deal—crispy, golden pork with that perfect sweet-tangy sauce balance.
Create the Crispy Pork Coating
In a large bowl, combine the 1.5 lb pork shoulder (cut into 1-inch cubes) with the 0.5 cup cornstarch and 2 tbsp baking powder. This combo creates an ultra-crispy, golden crust that's the secret to authentic Chinese takeout texture. Toss everything together until each pork piece is evenly coated—you should see a fine, powdery layer clinging to the meat.
Let the coated pork rest for 15 minutes at room temperature. This step is crucial because cold pork absorbs oil differently, leading to uneven frying. The baking powder might seem odd, but it reacts with the oil to create that signature crunch. Don't skip it!
Deep-Fry the Pork to Golden Perfection
Heat 2 cups vegetable oil in a deep skillet or wok over medium-high heat until it reaches 350°F. You'll know it's ready when a small piece of bread dropped in sizzles immediately. Working in batches (don't overcrowd the pan!), carefully add the coated pork and fry for 3-4 minutes, stirring gently, until golden brown and cooked through.
Remove the pork with a slotted spoon and drain on paper towels. The oil should be hot but not smoking—if it gets too hot, the pork will burn before cooking through. Keep the fried pork warm in a 200°F oven while you make the sauce. This maintains crispiness until serving time.
Build the Signature Sweet-Tangy Sauce
In the same skillet (no need to clean it—those crispy bits add flavor!), add the 4 minced garlic cloves and cook for 30 seconds until fragrant. Then add the 1 sliced green bell pepper and 1 sliced red bell pepper, cooking for 2 minutes until slightly softened. This step develops the base flavor of your sauce.
Pour in the 0.5 cup white vinegar and 0.5 cup brown sugar, stirring constantly for 1 minute until the sugar dissolves and the mixture begins to bubble. Add the 0.5 cup ketchup and 0.33 cup soy sauce, then let it simmer for 3 minutes until slightly thickened. This is where the magic happens—the balance of sweet, tangy, and umami flavors comes together.
Combine and Finish
Return the fried pork to the skillet and toss gently to coat evenly in the sauce. Add the 1 cup pineapple chunks and stir for 1-2 minutes until everything is well combined and heated through. The pineapple should be warm but not mushy—just enough to release its natural sweetness into the sauce.
Taste and adjust seasoning with 1 tsp salt and 0.5 tsp ground black pepper if needed. The sauce should coat the back of a spoon but still be slightly glossy. If it's too thick, add 1-2 tablespoons of water to loosen it. Serve immediately over steamed rice for that classic sweet and sour pork experience!
Pro Tips For Making Authentic Chinese Sweet And Sour Pork
- VELVET THE PORK FIRST: Skip the raw pork shoulder straight into the fryer—it’ll steam instead of sear. Cut it into 1-inch cubes, toss with 1 tablespoon cornstarch, then microwave for 3 minutes (yes, really) to relax the fibers. This guarantees a crispy crust that doesn’t turn greasy mid-fry.
- DON’T RUSH THE SAUCE: The sauce needs time to thicken properly. After adding the ketchup, vinegar, and sugar, simmer uncovered for at least 8 minutes—no peeking! The baking powder (yes, it’s in there) reacts slowly, and rushing it makes the sauce cloyingly sweet instead of tangy-balanced.
- FROZEN PINEAPPLE IS A CRIME: Thawed pineapple gets mushy and watery, drowning your sauce. Use fresh chunks or canned pineapple in juice (drained), then pat them dry with paper towels. If you’re short on time, frozen works—but squeeze out every drop of ice before adding it to the sauce.
- DOUBLE-FRY FOR CRUNCH: The first fry cooks the pork, but the second fry (after tossing in the sauce) is what locks in that restaurant-style crunch. Heat the oil to 350°F (175°C) for the second round—hot enough to crisp but not so hot it burns the sugar in the sauce. Work in small batches or the oil temp will drop.
Best sauces and condiments for authentic chinese sweet and sour pork
Sauce Foundation
The heart of this dish starts with the sauce, where white vinegar and brown sugar create that signature tangy-sweet balance. I always use white vinegar for its sharp acidity—it cuts through the richness of the pork beautifully. For the sugar, light brown sugar adds subtle molasses notes that deepen the flavor profile. The ketchup might seem unusual, but it's essential for that classic umami depth you find in authentic versions. 🍅
Don't skip the garlic—4 minced cloves are non-negotiable. They infuse the sauce with aromatic warmth that complements the vinegar's sharpness. The bell peppers add both color and a subtle crunch that contrasts with the tender pork. I like to use green and red bell peppers together for that vibrant visual pop that makes the dish look as good as it tastes.
Sweet-Tangy Balance
The sauce needs to reduce until it's syrupy but still glossy—this is where the magic happens. Simmer it for 3-4 minutes until it coats the back of a spoon. If it's too thick, add 1 tablespoon water at a time until you reach the right consistency. The sauce should be balanced: if it tastes too sweet, add a splash more vinegar; if it's too sour, stir in a pinch of sugar. Taste as you go—this is where home cooks often go wrong by not adjusting to their preference.
For extra depth, I sometimes add 1 teaspoon of oyster sauce or ½ teaspoon of MSG (if you have it). These ingredients elevate the sauce from good to restaurant-quality without overpowering the other flavors. The key is patience—rushing the reduction will leave you with a thin, watery sauce that won't cling to the pork properly.
Pineapple Integration
Adding the pineapple chunks at the end is crucial—they should just warm through, not cook completely. This preserves their natural sweetness and slight tartness, which brightens the entire dish. I prefer fresh pineapple because it releases more juice and adds a fresher flavor, but canned pineapple works in a pinch if you drain it well. The juice from the pineapple also helps thin the sauce slightly, creating that perfect glossy finish.
For a smoky twist, I sometimes add ½ teaspoon of smoked paprika to the sauce while it's simmering. This gives it a subtle depth that reminds me of the Cantonese restaurants I visited during my apprenticeship. The pineapple's acidity cuts through any richness, making each bite perfectly balanced. Don't skip this step—it's what transforms this from a home recipe to something truly special.
Flavor Boosters
Want to take your sauce to the next level? Add 1 teaspoon of sesame oil at the very end for a nutty aroma that complements the pork beautifully. Or stir in 1 tablespoon of hoisin sauce for extra richness. These additions are optional but make a world of difference in achieving that restaurant-quality depth. The sesame oil should be added just before serving so its delicate flavor isn't cooked off.
For a spicy kick, I sometimes add ½ teaspoon of chili flakes or a dash of Sichuan peppercorn powder to the sauce. This adds a subtle heat that balances the sweetness perfectly. The chili flakes work best if added at the end, while the Sichuan peppercorn powder can be incorporated earlier in the simmering process for a more integrated heat. 🌶️
Nutrition facts
Frequently asked questions
Why does this recipe use baking powder for the pork coating?
Baking powder creates that signature crispy, airy crust you find in authentic Chinese takeout! When combined with cornstarch and heated in oil, it reacts to form tiny bubbles that puff the coating, giving each bite that satisfying crunch. Without it, your pork will be delicious but miss that restaurant-quality texture.
Can I substitute chicken or shrimp for the pork?
For chicken, use 1.5 lb boneless thighs cut into 1-inch pieces and reduce frying time to 2-3 minutes to avoid overcooking. Shrimp should be peeled and deveined, coated lightly (they cook faster), and fried for just 1 minute per side. The sauce recipe remains identical—just adjust cooking times based on protein type.
How do I fix soggy pork after frying?
Soggy pork happens when the coating absorbs moisture. To prevent it: Pat pork completely dry before coating, fry in small batches, and keep fried pork warm in a 200°F oven while making sauce. If it's already soggy, reheat in a dry skillet over medium-high heat for 2-3 minutes to crisp up the coating.
What's the secret to balancing the sweet and sour flavors?
The magic is in the reduction! Simmer the sauce until it coats the back of a spoon, then taste as you go. If too sweet, add 1 tsp more vinegar; if too sour, stir in ½ tsp sugar. The ketchup and soy sauce provide umami depth that bridges the gap between sweet and tangy notes.
Can I make this dish ahead of time?
Yes! Fry the pork and make the sauce separately, then store them in airtight containers in the fridge for up to 2 days. Reheat pork in a dry skillet to restore crispiness, then warm sauce separately. For best results, combine just before serving to maintain that fresh-from-the-wok texture.