
Main Courses
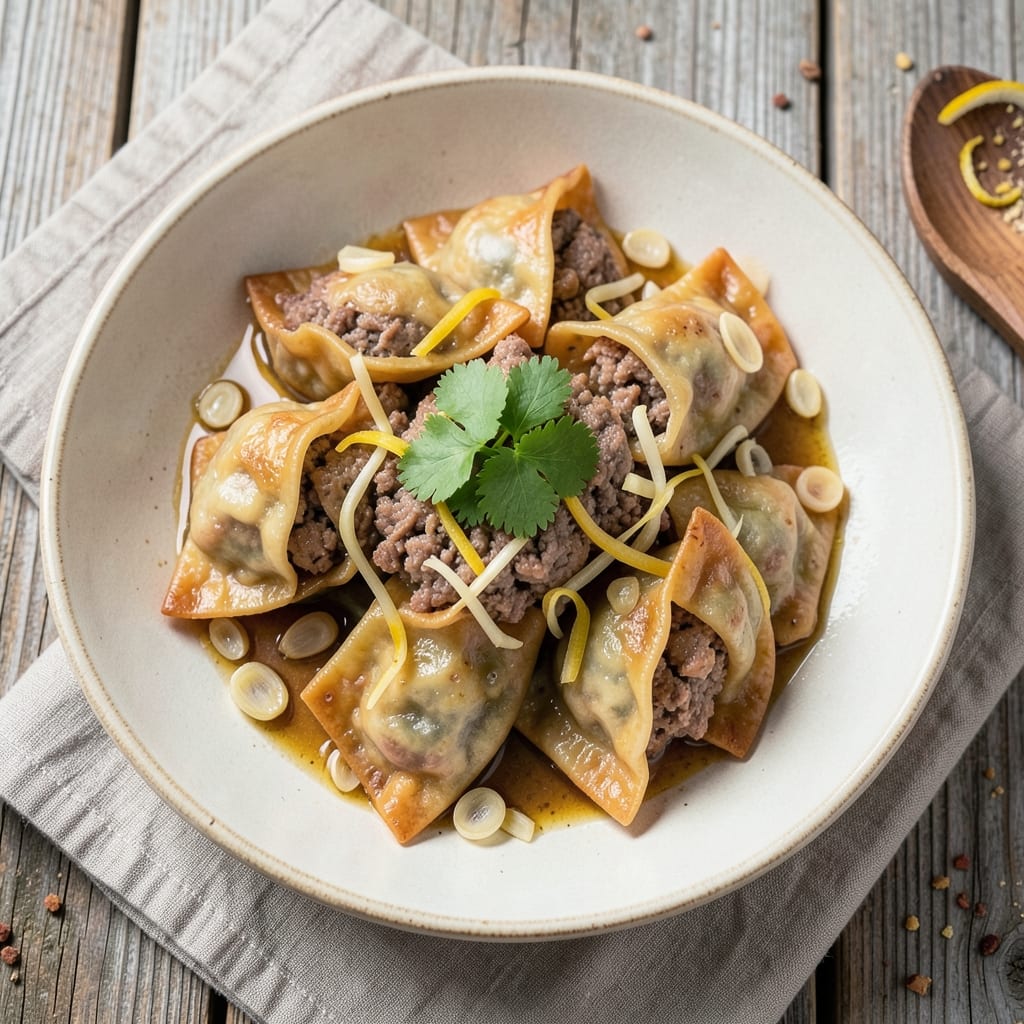
Mastering authentic pork potstickers means balancing crispy edges with juicy centers—something I perfected after years of testing in my Atlanta kitchen. The secret lies in the dough's elasticity and a filling that stays tender through pan-frying. This recipe delivers the same results as my favorite Shanghai dumpling shops, right in your home.
We start with a simple wheat flour dough that develops naturally through resting, giving it that signature chewiness. The filling combines ground pork with aromatic ginger, garlic, and scallions, all finely minced for even distribution. Pleating the edges properly ensures they seal tightly during cooking, preventing leaks that ruin the crispy exterior.
Pan-frying in small batches creates the perfect contrast—golden, shatteringly crisp edges while the pork inside remains succulent and flavorful. The high heat sears the bottom instantly, then we finish steaming to cook through without losing that texture. Serve with a tangy vinegar-chili sauce for dipping, and you've got a dish that's equal parts restaurant-quality and comforting.
This method scales beautifully for gatherings, and the leftovers reheat perfectly in a steamer. Whether you're feeding a crowd or treating yourself to a special meal, these potstickers deliver the same satisfaction I get from my own farm-raised pork—rich, flavorful, and impossible to resist.
Ingredients for authentic pork potsticker
High-protein flour, aromatic fillings, and careful pleating—these ingredients deliver restaurant-quality potstickers at home.
| Ingredient | Amount | Notes |
|---|---|---|
| All-Purpose Flour 🌾 | 2 ½ cups | High-protein for elasticity |
| Water 💧 | ¾ cup | Lukewarm for dough activation |
| Vegetable Oil 🫒 | 1 tbsp | For dough workability |
| Ground Pork Shoulder 🥩 | 1 ¼ lb | Farm-raised preferred, finely ground |
| Fresh Ginger 🌿 | 1 ½ tbsp | Finely minced, aromatic |
| Garlic Cloves 🧄 | 4 cloves | Minced, fresh preferred |
| Scallions 🧅 | ¼ cup | Thinly sliced, white parts only |
| Soy Sauce 🍶 | 2 tbsp | Light or all-purpose |
| Sesame Oil 🫒 | 1 tbsp | Toasted for nutty aroma |
| Shaoxing Wine 🍷 | 1 ½ tbsp | Or dry sherry substitute |
| Cornstarch 🌾 | 2 tbsp | For crispy exterior |
| Neutral Oil 🫒 | ½ cup | High smoke point for frying |
| Black Pepper 🌶️ | ½ tsp | Freshly cracked |
| Salt 🧂 | ½ tsp | Diamond Crystal preferred |
The flour is key—King Arthur or Gold Medal with 12-14% protein gives that signature chewiness. For the pork, farm-raised shoulder from Whole Foods or your local butcher makes all the difference—look for good marbling. Fresh ginger and garlic should smell vibrant, not dried out. I always double-check the scallions are bright green at the base. The Shaoxing wine? Trader Joe's has a great budget option, but any dry sherry works in a pinch—just avoid the sweet varieties. Toast the sesame oil gently in a dry pan first to deepen its flavor, about 30 seconds on low heat.
No Shaoxing wine? Dry white wine or even rice vinegar adds acidity, though the flavor won't be identical. The cornstarch is non-negotiable for that crispy exterior—don't skip it. For the oil, avocado or refined peanut oil works best for high-heat frying. If you can't find farm-raised pork, regular ground pork with extra fat helps keep the filling juicy. The dough needs to rest for at least 30 minutes—this develops the gluten for that perfect chewy texture. And if your scallions are old, green onion powder at half the amount works in a bind, though fresh is always better.
The dough keeps for 3 days wrapped in plastic in the fridge, or 3 months frozen between parchment paper. The filling can be prepped a day ahead and stored in an airtight container. For frying, work in small batches of 8-10 potstickers—crowding the pan steams them instead of searing. Leftover potstickers reheat beautifully in a steamer for 5 minutes, or you can pan-fry again for extra crispiness. I always make a double batch because they disappear fast—these are the kind of leftovers people fight over.
Why You'll Love This Recipe
- I’ll be real: the dough is so simple it feels like cheating. Just flour, water, and a pinch of oil—no standing at the counter, no overworking. Roll it out once, cut circles, and you’re done. Even my kids can handle the shaping after one try.
- Here’s what sold me: make a batch, freeze extras, and pull them out whenever. Pan-fry from frozen, no thawing needed. Perfect for lazy Mondays or when you’ve got a houseful of hungry people who all demand potstickers.
Step-by-step instructions for authentic pork potstickers
Here's how to achieve that perfect balance of crispy edges and juicy centers every time.
Prepare the Dough for Wraps
In a large mixing bowl, combine the 2.5 cups all-purpose flour with the 0.5 tsp salt and 0.5 tsp black pepper. Make a well in the center and add the 0.75 cup lukewarm water and 1 tbsp vegetable oil. Using a fork, gently mix until a shaggy dough forms.
Turn the dough onto a lightly floured surface and knead for 5-7 minutes until smooth and elastic. Real talk: this step matters—you want the dough to be pliable but not sticky. Wrap it in plastic wrap and let it rest for 30 minutes at room temperature. This resting period relaxes the gluten, making it easier to roll thin and even wrappers for your potstickers.
Create the Signature Filling
In a large bowl, combine the 1.25 lb ground pork shoulder, 1.5 tbsp finely minced fresh ginger, 4 minced garlic cloves, 0.25 cup thinly sliced scallions (white parts only), 2 tbsp soy sauce, 1.5 tbsp Shaoxing wine, and 1 tbsp toasted sesame oil. Mix thoroughly with your hands until all ingredients are evenly distributed.
Here's the thing—don't overwork the pork or it'll get tough. Gently knead the mixture just until combined, then let it sit for 10 minutes at room temperature. This allows the flavors to meld and the pork to relax slightly, ensuring tender potstickers. Taste a small piece and adjust seasoning if needed—authentic flavor starts with balanced seasoning.
Roll and Assemble the Potstickers
Divide the rested dough into 16 equal pieces (about 1.5 ounces each). Roll each piece into a thin circle about 4 inches in diameter on a lightly floured surface. I like to use a rolling pin for even thickness—aim for paper-thin wrappers. Keep the unused dough covered to prevent drying.
Place 1 tablespoon of the pork filling in the center of each wrapper. Fold the wrapper in half to cover the filling, then press the edges firmly to seal. For that classic half-moon shape, pinch the edges tightly and make a small pleat at the top. Arrange the assembled potstickers on a plate and cover with a damp towel to prevent drying while you prepare the pan.
Pan-Fry to Golden Perfection
Heat 0.5 cup neutral oil in a large non-stick skillet over medium-high heat until shimmering. Arrange the potstickers in a single layer, leaving ½ inch between each. Cook undisturbed for 2-3 minutes until the bottoms are deep golden brown and crispy. This is the moment that matters: don't rush it or the edges won't crisp properly.
Carefully flip each potsticker using a pair of tongs and add 2 tbsp cornstarch to the pan. Stir gently to coat the bottoms with the cornstarch mixture, then add ¼ cup water. Cover the skillet and steam for 4-5 minutes until the liquid evaporates and the potstickers are cooked through. The cornstarch creates that signature crispy texture while the steam keeps the centers juicy.
Serve with Classic Dipping Sauce
Transfer the potstickers to a serving platter and let them rest for 2 minutes before serving. The resting period allows the juices to redistribute, ensuring each bite is tender and flavorful. Serve immediately with a simple dipping sauce made from 2 tbsp soy sauce, 1 tbsp rice vinegar, and a pinch of red pepper flakes for heat.
You've got this: those crispy edges and juicy centers are well within your reach. The key is patience—don't rush the cooking process, and you'll achieve restaurant-quality potstickers every time. Enjoy your homemade creation with a side of steamed greens for a complete meal.
Pro Tips For Making Authentic Pork Potsticker
- STEAM THE WRAPPERS: After pan-frying your potstickers, cover the skillet with a tight lid and let them steam for 3–5 minutes off the heat. This turns the bottom crispy while keeping the filling juicy—no soggy wrappers here. I used to skip this, and my potstickers always felt half-done.
- GRIND THE GINGER FINE: For that authentic bite, grate the fresh ginger into a paste using the smallest holes of a box grater, then mix it directly into the pork. Lumpy ginger just sits there; a smooth paste distributes flavor evenly. My first batch had visible specks, and it tasted uneven.
- DON’T OVERWORK THE DOUGH: Knead the flour-water mix just until it comes together—about 2–3 minutes. Overworking develops gluten, making the wrappers tough instead of tender. I learned this after rolling out dough so thin it tore like paper.
- USE COLD PORK FILLING: Chill the pork mixture for 15 minutes before assembling. Cold filling stays compact when wrapped, so your potstickers hold their shape better during frying. Warm filling spreads, and you’ll end up with messy, uneven edges.
Perfect pairings for these flavors
Dipping Sauce Variations
Start with the classic soy-vinegar-chili sauce—2 tbsp soy sauce, 1 tbsp rice vinegar, and a pinch of red pepper flakes—but don’t stop there. For a spicy Sichuan twist, add 1 tsp chili crisp and a dash of black vinegar for depth. My go-to shortcut? Mix 1 tbsp hoisin sauce with 1 tsp sesame oil for a sweeter, nutty balance. 🌶️
Side Dish Pairings
A crisp cucumber salad with thinly sliced Persian cucumbers, 1 tbsp rice vinegar, and ½ tsp sugar cuts through the richness. For heartier meals, serve with steamed bok choy tossed in 1 tsp toasted sesame oil. I also love pairing potstickers with quick-pickled veggies—just ½ cup shredded carrots and 1 tbsp apple cider vinegar for 10 minutes. The acidity brightens every bite.
Drink Recommendations
For a refreshing match, sip jasmine tea—its floral notes complement the pork’s savory depth. A light Chinese white wine like Dragonwell (longjing) enhances the dish’s elegance. If you prefer beer, a crisp lager like Tsingtao cleanses the palate without overpowering. For something stronger, Shaoxing wine (the same used in the filling) makes a bold pairing—just chill it first. 🍶
Global Twists
Turn potstickers into tacos by serving them in warm tortillas with avocado crema and pickled onions. For a Korean-inspired version, swap the filling for bulgogi-marinated beef and add a gochujang glaze. My favorite fusion? Buffalo potstickers—toss cooked potstickers in 2 tbsp buffalo sauce and serve with blue cheese dressing. The heat and tang are a game-changer. 🔥
Make-Ahead Tips
Assemble potstickers up to 24 hours ahead and refrigerate them on a tray. Freeze uncooked potstickers on parchment-lined trays for 1 hour, then transfer to a bag for up to 3 months. To reheat, steam for 5 minutes or pan-fry in ½ inch oil over medium heat for 2-3 minutes per side**. Pro tip: Spritz frozen potstickers with water before steaming for extra crispiness. ❄️
Nutrition facts
Frequently asked questions
Can I use ground beef instead of pork for potstickers?
While beef potstickers exist in some regional variations, pork is traditional for its tender texture and rich flavor. If you must substitute, use 80/20 ground beef (not lean) and add 1 extra tbsp soy sauce to compensate for the beef's stronger taste. The fat content helps keep them juicy, but the texture will differ slightly.
Why did my potstickers turn out soggy instead of crispy?
Soggy potstickers usually mean one of three things: overcrowding the pan, insufficient oil, or not sealing the edges properly. Always cook in small batches with ½ inch space between each, use enough oil to coat the bottom (½ cup for 8 potstickers), and press the edges firmly to prevent leaks. The cornstarch coating is also key—don't skip it!
How do I make the dough without a rolling pin?
No problem! Use a clean wine bottle or even a heavy glass. Roll the dough between two sheets of parchment paper for easier handling. For extra thin wrappers, gently press with your fingers after rolling. The dough should be paper-thin—about 1/16-inch thick—for that authentic texture.
Can I bake these instead of pan-frying?
Baking won't give you that signature crispy exterior, but you can achieve a crispier version by baking at 425°F for 12-15 minutes on a wire rack over a baking sheet. Brush with 1 tbsp oil before baking for extra crunch. For best results, steam them first in the oven (cover with foil for 8 minutes) then crisp in the oven.
What's the best way to reheat leftover potstickers?
Steaming is your best friend! Place potstickers in a steamer basket over boiling water for 5 minutes to restore moisture. For extra crispiness, pan-fry in ½ inch oil over medium heat for 2-3 minutes per side. Never microwave—it makes them rubbery. Pro tip: Spritz with water before reheating for that golden crust.