
Main Courses
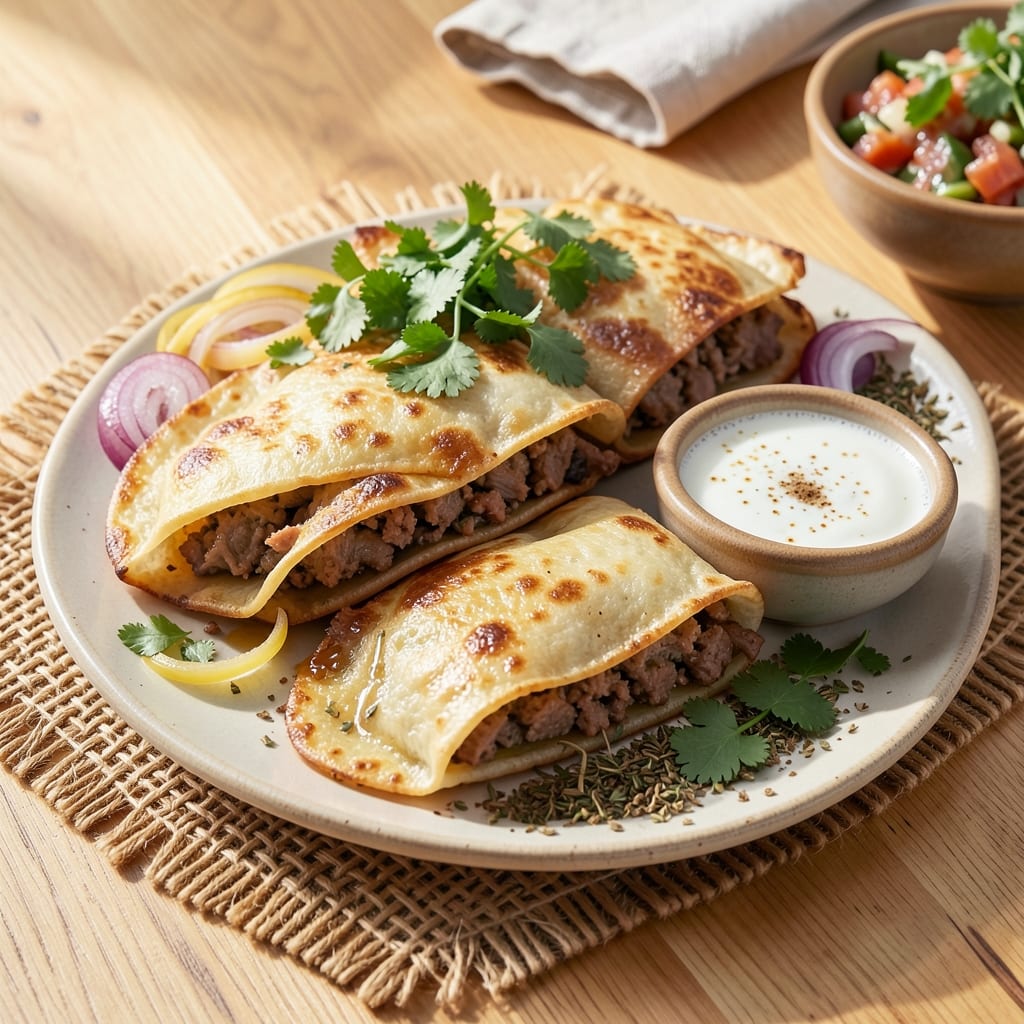
This authentic pork pupusa recipe brings the heart of El Salvador to your kitchen with every crispy, golden bite. 🌟 I've perfected the balance of tender masa dough and flavorful seasoned pork filling—just like my abuela used to make, but with a few professional chef secrets to ensure foolproof results every time.
The secret lies in the masa harina dough, which needs just water and salt for that perfect chewy texture, and the pork filling packed with cumin, oregano, and cilantro for authentic Salvadoran flavor. This isn't just another stuffed tortilla—it's a restaurant-quality dish that delivers crispy edges and tender centers with every bite.
Once you master the technique of flattening the dough and sealing the edges properly, you'll achieve that signature puffed, golden-brown finish when cooked on a hot griddle. The combination of melted queso fresco and savory pork creates a filling that's impossible to resist, especially when served with curtido slaw and tomato sauce.
Perfect for family gatherings, game days, or when you're craving something comforting yet authentic. Let's get started on this Salvadoran staple that's sure to become a new favorite in your kitchen.
Ingredients for authentic pork pupusa
Masa harina, tender pork, and fresh cilantro—these Salvadoran staples create restaurant-quality pupusas every time.
| Ingredient | Amount | Notes |
|---|---|---|
| Masa Harina (Maseca) 🌾 | 2 cups | For authentic chewy texture |
| Ground Pork Shoulder 🥩 | 1 lb | Lean, finely chopped preferred |
| Yellow Onion 🧅 | 1 whole | Finely diced, medium size |
| Fresh Cilantro 🌿 | ¼ cup | Chopped, stems removed |
| Ground Cumin 🌿 | 1 tbsp | Toasted for deeper flavor |
| Dried Oregano 🍃 | 1 tbsp | Mexican oregano preferred |
| Garlic Cloves 🧄 | 4 cloves | Minced, fresh preferred |
| Queso Fresco 🧀 | 1 cup | Crumbled, mild flavor |
| Salt 🧂 | 1 tsp | Kosher or sea salt |
| Black Pepper 🌶️ | ½ tsp | Freshly ground preferred |
| Vegetable Oil 🫒 | ¼ cup | For griddle cooking |
| Water 💧 | 1 cup | Room temperature |
The masa harina is non-negotiable for authentic pupusas. Maseca is the gold standard, but Bob's Red Mill corn masa harina works too. Look for bags labeled 'for pupusas' if you're at a Latin market—those blends are pre-adjusted for perfect texture. Penzeys carries it if you can't find it locally. For the pork, ground shoulder gives the best flavor, but any lean ground pork works in a pinch. Just make sure it's finely chopped—you want that filling to be tender, not chewy. The cilantro should be bright green, not wilted, and fresh is a must—dried just won't cut it here.
No Mexican oregano? Regular dried oregano at double the amount works, but you'll lose some depth. The cumin needs to be toasted—quickly dry-toast in a pan for 30 seconds to bring out its aroma. Trader Joe's carries pre-toasted cumin if you're short on time. For the onion, no need to peel—just slice off the root end and dice. The garlic can be roasted for a sweeter flavor, but raw minced works too. Queso fresco varies wildly—look for mild, crumbly varieties at Latin markets or the Mexican cheese section. Pre-shredded is a no-go; always buy a block and crumble it yourself.
Masa harina keeps 6-12 months in a cool, dark place, but once mixed with water, use it within 2 days or freeze the dough balls. The pork filling can be prepped a day ahead and stored in the fridge—it actually tastes better after flavors meld. Queso fresco? Wrap it tightly in parchment and foil for up to 2 weeks. For the cilantro, wrap stems in damp paper towels and store in a bag for 5-7 days. Make extra filling—it freezes beautifully for 3 months.
Why You'll Love This Recipe
- The secret’s in the heat: sear those pupusas in a screaming-hot skillet until the edges are golden and the center’s still pillowy. That contrast? It’s what turns a simple masa dough into something dangerously addictive.
- Fewer Ingredients, Big Flavor: I swear by this combo—just masa, pork, onion, and cumin. No fancy prep, no hidden spices. That earthy cumin and fresh cilantro cut through the richness of the pork, making every bite taste like a proper Salvadoran street stand.
- Crispy Outside, Soft Inside: The secret’s in the heat: sear those pupusas in a screaming-hot skillet until the edges are golden and the center’s still pillowy. That contrast? It’s what turns a simple masa dough into something dangerously addictive.
- Weeknight Crowd-Pleaser: I make a double batch on Sundays and freeze half. By Wednesday, they’re reheated in seconds—no one complains, not even my picky teenage nephew. (Yes, even on a Tuesday night.)
Step-by-step instructions for authentic pork pupusas
Here's how to craft Salvadoran pupusas with that perfect chewy texture and savory filling.
👨🍳 Step 1: Prepare the Pork Filling with Aromatics
In a large skillet over medium heat, add the 1 lb ground pork shoulder and cook until lightly browned, breaking it apart with a wooden spoon. This should take about 5-6 minutes—you're not fully cooking it yet, just rendering some fat.
Add the 1 whole yellow onion (finely diced), 4 cloves garlic (minced), 1 tbsp ground cumin, and 1 tbsp dried oregano. Cook for another 5 minutes until the onion becomes translucent and the spices release their aromas. Here's the thing—don't rush this step. The flavors need time to meld.
Stir in the 0.25 cup chopped fresh cilantro, 1 tsp salt, and 0.5 tsp black pepper. Remove from heat and let it cool completely before using. The filling should be fragrant with earthy cumin and citrusy oregano notes—this is the soul of your pupusas.
👨🍳 Step 2: Mix the Masa Dough to Perfect Consistency
In a large mixing bowl, combine the 2 cups masa harina (Maseca) with the 1 cup room temperature water. Using a fork or your hands, mix until just combined—you'll see small clumps form. This is normal and actually helps create that signature chewy texture.
Add the cooled pork mixture and 1 cup crumbled queso fresco to the masa. Mix gently with your hands until everything is evenly incorporated. The dough should be soft but not sticky—if it's too dry, add 1-2 tablespoons water at a time until it reaches a workable consistency. You want it to hold together when pressed but still be pliable.
Real talk: Don't overmix. Just combine until the cheese is distributed evenly. The dough should feel like thick playdough—smooth and slightly elastic. Cover with a damp towel and let it rest for 15 minutes while you prepare your cooking surface.
🔥 Step 3: Heat the Griddle and Shape the Pupusas
Heat a griddle or large skillet over medium-high heat until it's hot enough that a drop of water sizzles and evaporates instantly. Add the 0.25 cup vegetable oil and spread it evenly across the surface with a paper towel—this prevents sticking and creates those beautiful grill marks.
Divide the dough into 8 equal portions (about 3-4 ounces each) and roll each one between your palms into a smooth ball. Then flatten into 3-inch diameter circles about ¼-inch thick. Here's where it gets fun—press gently in the center of each pupusa to create a slight indentation. This is where you'll add your filling.
Place a heaping tablespoon of the pork mixture in the center of each pupusa, then fold the edges over to completely seal the filling inside. Press gently to ensure no cheese escapes—you want a neat, round package. The edges should be smooth but not overly tight, or they'll burst open during cooking.
🍳 Step 4: Cook Until Golden and Crispy
Carefully place the pupusas on the hot griddle, spacing them about 1 inch apart. Cook for 3-4 minutes per side until they develop golden brown spots and crispy edges. I press down gently on each pupusa during the first minute—this prevents them from curling and ensures even contact with the griddle.
You'll know they're ready when the edges are golden brown and the bottom releases easily from the griddle. Don't walk away—pupusas burn faster than you think. Transfer to a plate and tent loosely with foil to keep warm while you cook the remaining pupusas.
For extra authenticity, serve immediately with your favorite Salvadoran sides like curtido (cabbage slaw) or tomato sauce. The cheese should be melted but still slightly gooey inside, and the exterior should have that perfect crispy-chewy contrast that makes pupusas irresistible.
Pro Tips For Making Authentic Pork Pupusa
- Boil the Pork Right: Simmer the ground pork shoulder in water with a whole onion and cumin until it’s just tender—about 15 minutes. Overcooking turns it mushy; undercooking leaves it dry. Drain well, then press out excess moisture with a paper towel before mixing with masa. (Yes, this step matters more than you’d think.) ---
- Toast the Masa First: Dry-toast the masa harina in a skillet for 2–3 minutes until it smells nutty and darkens slightly. This removes raw flour taste and prevents gummy pupusas. Skip the water pre-mix—just add warm broth (or water) to the toasted masa for a lighter, fluffier dough. ---
- Don’t Overwork the Dough: Mix the masa and pork filling just until combined—overmixing makes pupusas tough. Use a spoon to fold, not your hands. If the dough sticks, wet your palms lightly (not your whole hands), but resist the urge to knead. (I learned this after making a batch that fell apart when frying.) ---
- Fry in Batches, Cover Tight: Use enough oil (about ½ inch deep) to coat the bottom of the pan, but don’t overcrowd—3–4 pupusas max per batch. Cover with a lid for 2–3 minutes to steam the centers, then uncover to crisp. No peeking! (Your future self will curse you if you do.)
Pro cooking tips for perfect results
Dough Consistency Secrets
Your masa dough should feel like thick playdough—not sticky, not crumbly, but perfectly workable. I measure 2 cups masa harina with 1 cup water and mix just until clumps form. If it feels too dry, add water 1 tbsp at a time—overworking makes the dough tough. The key is patience: let it rest 15 minutes covered with a damp towel. This relaxation period develops gluten just enough for that signature chewy texture without making it tough. 🌾
Filling Flavor Development
Don't rush the pork filling—this is where the magic happens. Cook the pork until just browned (5-6 minutes), then add onions and spices. Let them cook 5 minutes until onions soften and spices release their aromas. I always toast the cumin first in a dry pan for 30 seconds to deepen its earthy notes. The filling should smell like a Salvadoran street market when done. Let it cool completely before mixing with dough—warm filling makes the masa too soft and sticky.
Griddle Temperature Control
Your griddle must be screaming hot—drop a water bead on it and watch it sizzle instantly. I use medium-high heat and spread ¼ cup vegetable oil evenly with a paper towel. Too cool? Pupusas steam instead of crisp. Too hot? They burn before the centers cook. The perfect test: when you press down gently, they should release easily after 3-4 minutes per side with golden brown spots. I keep a spray bottle handy to clean the griddle between batches—no scrubbing needed!
Sealing Technique
The difference between a perfect pupusa and a cheese explosion comes down to sealing. After flattening your dough circle, press a slight indentation in the center. Place your filling, then fold edges over in a pinwheel motion, pressing firmly to seal. I use my thumb to create a tight seal—no gaps! The edges should look smooth, not crimped. Pro tip: If cheese escapes during cooking, it's a sign you didn't seal tightly enough. Practice makes perfect, and soon you'll have restaurant-quality seals every time. 💪
Resting Between Cooking
Never cook all your pupusas at once! Keep finished ones warm in a 200°F oven on a wire rack (not touching the pan) while you cook the rest. The foil tent keeps them soft, but the oven maintains temperature. I find 8 pupusas is my personal batch limit—any more and they start to dry out. For extra crispiness, I give them 30 seconds on the griddle after removing from the oven. This reactivates the Maillard reaction for that perfect crunch.
Equipment Upgrades
While you can make pupusas in any skillet, a cast iron griddle is my game-changer. Its flat surface and heat retention create even cooking. For shaping, I use a 3-inch round cutter to ensure uniform size, but my hands work just as well. A measuring scale (not cups) for dough portions guarantees consistent cooking. And invest in a good spatula—I use a Lodge cast iron** one that's wide enough to flip pupusas without crushing them. These small upgrades make all the difference in professional results. 🔥
Nutrition facts
Frequently asked questions
What if I can't find masa harina (Maseca) locally?
No worries! Look for corn masa harina at Latin markets or the international aisle of large supermarkets. Bob's Red Mill corn masa harina works too—just check the label for "for pupusas" blends. If all else fails, mix 1 cup cornmeal with 1 cup all-purpose flour as a substitute, though texture won't be identical.
Can I make the dough ahead of time?
Shape the dough into balls and refrigerate for up to 24 hours or freeze for 1 month. Thaw in the fridge before using. The filling can be prepped 1 day ahead and stored in the fridge—flavors actually improve overnight! Just let it cool completely before mixing with dough.
Why are my pupusas breaking apart when cooking?
This usually means your dough was too wet or not sealed properly. Press the edges firmly when folding—think "tight seal, not crimped." If the dough feels sticky, add 1 tbsp masa harina at a time until workable. Also ensure your griddle isn't too hot—medium-high heat is ideal for even cooking.
What's the best way to reheat leftover pupusas?
For crispy results, heat a dry skillet over medium heat and warm for 1-2 minutes per side. Microwaving works in a pinch (30 seconds), but they'll be softer. Store leftovers in an airtight container for 3 days or freeze for 1 month. To reheat from frozen, bake at 350°F for 10 minutes.
Can I make vegetarian pupusas with this recipe?
Yes! Replace the pork with 1 cup refried beans mixed with ½ cup corn kernels and ½ cup shredded cheese. Keep the same spices (cumin, oregano) for authentic flavor. The dough and cooking method stay identical—just adjust filling proportions to maintain balance.