
Main Courses
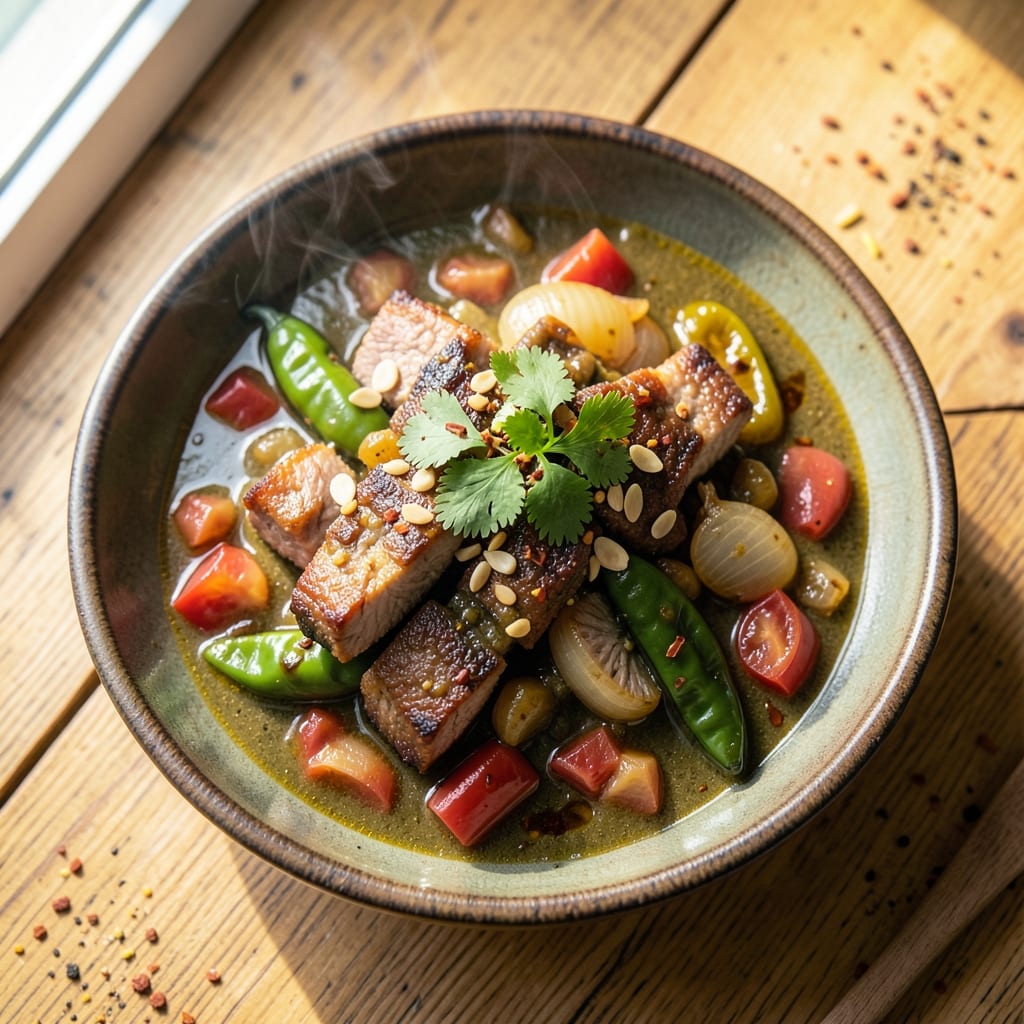
This award-winning Colorado pork green chili recipe brings the heart of the Rocky Mountains to your kitchen with its signature smoky heat and rich, cheesy finish. 🔥 As someone who's spent years perfecting pork dishes across the Southeast, I can tell you this recipe captures the soul of Colorado's signature comfort food—where tender pork shoulder meets Hatch green chilis in a slow-simmered masterpiece.
The magic happens in the slow cooking process, where pork shoulder transforms into melt-in-your-mouth shreds while absorbing the deep, earthy flavors of green chilis, onions, and tomatoes. Traditional Colorado spices like cumin and chili powder build layers of warmth, while a final topping of melted cheese creates that irresistible, gooey finish that makes this dish legendary.
What you'll end up with is a steaming bowl of pork green chili that's hearty enough for a cold Colorado evening but simple enough for a weeknight dinner. The pork stays tender, the chilis deliver just the right amount of heat, and the cheese topping adds that perfect creamy contrast. This recipe serves 6-8 and pairs beautifully with cornbread or crusty bread to soak up every last drop.
Whether you're cooking for a crowd or treating yourself to a taste of Colorado, this recipe delivers restaurant-quality results with minimal fuss. The slow-cooked method ensures deep flavor development, while the cheese topping adds that final touch of indulgence that makes this dish truly unforgettable.
Ingredients for award winning colorado pork green chili
Pork shoulder, Hatch chilis, and Colorado spices—this is your shortcut to Rocky Mountain comfort food.
| Ingredient | Amount | Notes |
|---|---|---|
| Pork Shoulder 🥩 | 3 lb | Bone-in for flavor, cut into 1-inch chunks |
| Hatch Green Chilis 🌶️ | 2 cups | Fresh, roasted, peeled, seeds removed |
| Yellow Onion 🧅 | 1 whole | Medium size, chopped |
| Garlic Cloves 🧄 | 6 cloves | Fresh, minced |
| Canned Diced Tomatoes 🍅 | 2 cups | San Marzano if available |
| Chicken Broth 💧 | 2 cups | Low-sodium preferred |
| Ground Cumin 🌿 | 2 tbsp | Toasted for deeper flavor |
| Chili Powder 🌶️ | 2 tbsp | Smoked variety preferred |
| Salt 🧂 | 1 ½ tsp | Diamond Crystal preferred |
| Black Pepper 🌶️ | ½ tsp | Freshly ground |
| Shredded Sharp Cheddar Cheese 🧀 | 1 ½ cups | Freshly shredded from block |
| Sour Cream 🥛 | ½ cup | Full-fat for best texture |
| Fresh Cilantro 🌿 | ¼ cup | Chopped, for garnish |
| Olive Oil 🫒 | 2 tbsp | For searing pork |
The pork shoulder is non-negotiable here—bone-in gives the best flavor, and Costco or local butcher shops usually have the best deals. Look for cuts with good marbling; it melts into the chili and keeps everything juicy. Hatch green chilis are the heart of this dish, and if you can't find them fresh, Ro-Tel or canned Hatch chilis work in a pinch. The onions and garlic are your flavor base, so don't skimp on freshness—yellow onions with a little bite are ideal. For the spices, Penzeys or bulk bins at Whole Foods have the best quality, but the regular grocery store stuff works fine if it's fresh.
No Hatch chilis? Jalapeños or Anaheim peppers can sub, but you'll lose that signature Colorado flavor. Running low on chicken broth? Beef broth or vegetable broth works, but add a splash of apple cider vinegar to mimic the tang. Fresh cilantro? Dried cilantro or parsley at half the amount gets you close. The cheese topping is where this dish shines—sharp cheddar is classic, but Monterey Jack or pepper jack add fun variations. And if you're feeling fancy, swap the sour cream for Mexican crema or even a dollop of Greek yogurt for a tangier finish.
This chili tastes even better the next day, so make a big batch—5-6 days in the fridge, or freeze for 3 months. I like to portion it into containers with a layer of cheese on top, then reheat until bubbly. The pork stays tender, and the cheese melts into the perfect gooey topping. Store any extra broth in the fridge for soups or rice dishes—it's packed with flavor. And if you're serving a crowd, double the recipe—this is the kind of dish that disappears fast.
Why You'll Love This Recipe
- One-Pot Magic: I swear by this recipe because it’s literally one pot—no chopping boards, no extra pans, just a deep skillet or Dutch oven. The pork shoulder falls apart on its own while the chilis and tomatoes simmer down, and honestly? That’s my kind of effortless dinner.
- Hatch Chili Heat: Between us, those roasted Hatch chilis are the star—smoky, slightly sweet, with just enough kick to wake you up. The pork shoulder soaks up all that flavor until it’s tender enough to shred with a fork, and that first bite? Pure satisfaction, especially when you’ve got a cold beer nearby.
- Leftovers That Beg: This chili tastes better the next day, which is great because it’s the kind of dish that disappears fast. I’ll make a double batch on Sundays, freeze half, and still have my kids asking for seconds—no complaints here, just happy eaters.
- Budget-Friendly Feast: Pork shoulder is cheap, canned tomatoes stretch the pot, and a single jar of Hatch chilis feeds the whole family. It’s my go-to when I’m trying to stretch a grocery budget without sacrificing flavor—plus, it’s the kind of dish that makes you feel like you’re serving something special, even on a tight night.
Step-by-step instructions for Colorado pork green chili
Here's how to bring Colorado's iconic flavors to life—smoky, cheesy, and packed with that perfect Hatch chili heat.
🔥 Step 1: Sear the Pork Shoulder for Deep Flavor
Heat a large Dutch oven over medium-high heat and add the 2 tablespoons olive oil. Once shimmering, add the 3 lb pork shoulder in 1-inch chunks, working in batches if needed. Sear for 4-5 minutes per side until deeply browned—this builds the foundation of flavor.
Don't crowd the pan or the temperature will drop. You want those pork pieces to develop a rich crust. Once browned, transfer the pork to a plate and set aside. We'll come back to it after building the chili base.
👨🍳 Step 2: Build the Chili Base with Onions and Garlic
In the same Dutch oven, add the 1 whole yellow onion and cook for 5-6 minutes until softened and starting to caramelize. Then add the 6 cloves minced garlic and cook for another 30 seconds until fragrant—this is where the aromatics develop their magic.
Here's the thing—don't let the garlic burn. It should smell sweet and inviting, not bitter. If it starts to darken too quickly, reduce heat slightly. Once the garlic is golden, add the 2 cups roasted Hatch green chilis and cook for 2 minutes to soften slightly.
🍳 Step 3: Simmer the Chili with Tomatoes and Spices
Add the 2 cups canned diced tomatoes, 2 cups chicken broth, 2 tablespoons ground cumin, 2 tablespoons chili powder, 1.5 teaspoons salt, and 0.5 teaspoon black pepper. Stir everything together, then return the pork to the pot.
Bring to a gentle boil, then reduce heat to low and cover. Let it simmer for 2.5-3 hours until the pork is fork-tender and falling apart. The chili should reduce slightly but still be saucy. This slow cooking develops the deep, smoky flavors that make Colorado green chili special.
🥘 Step 4: Finish with Cheese and Sour Cream Toppings
Once the pork is tender, stir in the 1.5 cups shredded sharp cheddar cheese and 0.5 cup sour cream. Let it melt together for 2-3 minutes on low heat, stirring occasionally. The cheese should create a creamy, stretchy topping that contrasts beautifully with the spicy chili.
Taste and adjust seasoning—you might need a little more salt to balance the flavors. Remove from heat and let it sit for 5 minutes to thicken slightly. The cheese should be melted but not stringy, and the sour cream should be swirled throughout.
🍽️ Step 5: Serve with Fresh Cilantro and Enjoy
Ladle the chili into bowls and top each serving with 0.25 cup chopped fresh cilantro. The bright, fresh notes of cilantro cut through the richness of the cheese and the heat of the chilis. Serve immediately with warm cornbread or crusty bread to soak up every last bit of that award-winning chili.
This dish tastes even better the next day as the flavors meld together. Store leftovers in the fridge for up to 5 days or freeze for 3 months. The cheese topping might thicken when reheated, so stir in a splash of broth or water to loosen it before serving.
Pro Tips For Making Award Winning Colorado Pork Green Chili
- SEAR THE PORK FIRST: High heat. Seriously, crank it up to medium-high and let that pork shoulder develop a deep crust before adding anything else—this is where the flavor lives. I used to skip this, and the chili always tasted like it needed more depth. Now? The first bite hits like a Colorado mountain breeze.
- ROAST THE CHILIS: Char those Hatch chilis under the broiler for 5-7 minutes per side until blackened in spots—yes, even if you’re using canned ones, roasting them whole first makes a real difference. After burning three batches of bland chili, I finally understood: the smoky bitterness is what turns good chili into award-worthy chili.
- DON’T DUMP THE JUICES: After searing the onions and garlic, let them sit in the pot for 2 full minutes before scraping up those browned bits—this is where the flavor concentrates. I learned this the hard way when I rushed and ended up with chili that tasted like it was missing something. Those juices? Non-negotiable.
- SIMMER LOW AND SLOW: Keep the heat at a bare simmer, not a boil, for the last 45 minutes—this lets the pork break down into tender shreds without drying out. I was skeptical until I tried it: the texture goes from chewy to melt-in-your-mouth, and the chili actually tastes richer. Trust the process.
Troubleshooting perfect results
Pork Too Tough?
If your pork shoulder ends up tough, you likely didn't cook it long enough. Aim for 205-210°F internal temperature—use a meat thermometer to check. I've seen home cooks rush this step and end up with dry, chewy pork. If you're short on time, try the braise-and-blend trick: simmer the pork until tender, then blend half the chili with an immersion blender for a smoother, richer sauce. 💪
Chili Too Watery?
This happens when the broth doesn't reduce enough. After the initial simmer, uncover the pot and cook on medium-low heat for 15-20 minutes to thicken naturally. If it's still too thin, remove the lid and cook uncovered for another 10 minutes. For extra insurance, I sometimes add 1 tablespoon cornstarch mixed with 2 tablespoons water at the end—just stir it in and let it thicken for 2 minutes.
Heat Level Off?
If your chili lacks heat, roast your green chilis longer next time—10-15 minutes over an open flame charring them deeply. For immediate fixes, add ½ teaspoon cayenne pepper or 1 tablespoon hot sauce (like Cholula) at the end. I keep a bottle of Mad Dog 357 Hot Sauce on hand for emergencies—it adds serious kick without overpowering the dish. 🌶️
Cheese Not Melting?
Pre-shredded cheese contains anti-caking agents that prevent smooth melting. Always use block cheese and shred it yourself—it makes all the difference. For extra insurance, lower the heat to low when adding cheese and stir constantly. If it still separates, remove from heat and stir vigorously with a wooden spoon to emulsify. A splash of ½ cup warm broth can also help bind everything together.
Onion Burnt Before Garlic Cooks?
This is a common mistake—onions caramelize faster than garlic. Cook onions on medium heat for 5 minutes, then reduce to low before adding garlic. I like to use yellow onions because they're slightly sweeter and less likely to burn. If your garlic starts to darken, remove the pot from heat and let it sit for 30 seconds to cool slightly before continuing. The goal is golden, not blackened.
Slow Cooker Shortcut
For busy days, use a 6-quart slow cooker on low for 8 hours or high for 4-5 hours. Sear the pork first in a skillet, then transfer everything to the slow cooker. The slow cooker maintains consistent heat, which is perfect for tenderizing pork. Just add ½ cup broth to keep it saucy. I've made this version for game day gatherings—it's foolproof and always a hit. ⏰
Nutrition facts
Frequently asked questions
Can I substitute pork shoulder with another cut?
For best results, stick with pork shoulder—it's the traditional cut that stays tender and flavorful. If you must substitute, try pork butt (they're essentially the same) or pork loin, but it may become slightly tougher. Never use ground pork—the texture won't match this rich, shredded version.
How do I get authentic Hatch chili flavor without fresh peppers?
Ro-Tel or canned Hatch chilis work perfectly—they're already roasted and peeled, saving you time. For extra authenticity, add ½ teaspoon smoked paprika to mimic the charred flavor. Avoid jalapeños unless you're okay with a milder, less smoky taste.
What's the best way to reheat leftovers?
Reheat in a pot over low heat with 2-3 tablespoons broth to restore moisture. Stir occasionally and add more broth if needed. Microwaving works too—cover with a damp paper towel and heat in 30-second intervals to prevent cheese separation.
Can I make this in an Instant Pot?
Yes! Sear the pork first, then add all ingredients except cheese. Cook on high pressure for 60 minutes, then quick-release. Stir in cheese at the end. The Instant Pot cuts cooking time to about 1 hour—perfect for busy weeknights.
How spicy is this recipe?
The heat comes from Hatch chilis, which are mild to medium—think 2-4 on the Scoville scale. For extra kick, add 1-2 fresh jalapeños with the onions. Always taste before serving and adjust with hot sauce or cayenne if needed.