
Main Courses
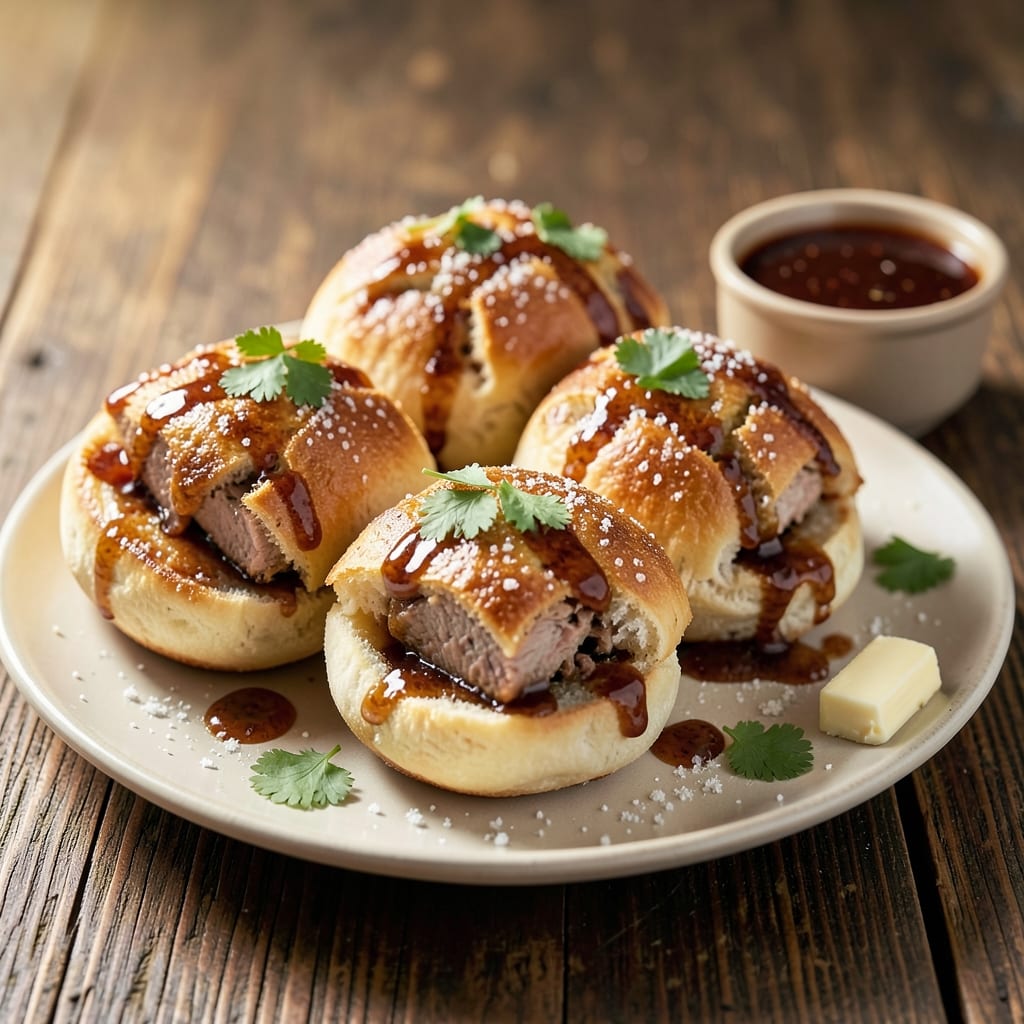
This baked barbecue pork buns recipe delivers the perfect balance of flaky, golden layers and smoky-sweet filling that’ll have everyone asking for seconds. 🔥 After years of perfecting the art of tender pork and pillowy buns, I’ve cracked the code for a version that’s restaurant-quality but simple enough for any kitchen. The secret lies in a slow-cooked pork shoulder infused with classic BBQ spices, then glazed with a sticky-sweet sauce that caramelizes beautifully in the oven.
The dough gets its signature texture from a foolproof method of layering butter and flour, then proofing just long enough to create those signature flaky folds. While the buns bake, the pork transforms into tender, juicy shreds that soak up the glaze, creating a filling that’s both rich and aromatic. This isn’t your average pulled pork sandwich—it’s a showstopper that tastes like a cross between a Southern BBQ joint and a French bakery.
By the time you pull these out of the oven, you’ll have golden, crisp-edged buns with a soft, airy center and a filling that’s dangerously addictive. The glaze isn’t just sweet—it’s got a deep, smoky backbone from the BBQ rub, making every bite complex and satisfying. Serve them warm with a side of pickles or coleslaw for the full experience.
What makes this recipe truly special is how it combines tradition with ease. No steaming required—just bake, and let the oven do the work. The result? Buns that stay soft for hours, with a filling that’s juicy and packed with flavor. Let’s get started on a dish that’s equal parts comforting and impressive.
Ingredients for baked barbecue pork buns
Twelve ingredients, three layers of flavor—flaky, smoky, and sweetly addictive.
| Ingredient | Amount | Notes |
|---|---|---|
| Pork Shoulder 🐖 | 4 lb | Bone-in, well-marbled for flavor |
| Unsalted Butter 🧈 | 1 cup | Cold, cubed for dough layers |
| All-Purpose Flour 🌾 | 6 cups | Plus 1 tbsp for dusting |
| Granulated Sugar 🍚 | ½ cup | For glaze sweetness |
| Brown Sugar 🍚 | ¼ cup | Packed, for caramelization |
| Apple Cider Vinegar 🍎 | ¼ cup | For tangy depth |
| Yellow Onion 🧅 | 1 whole | Diced, for pork seasoning |
| Garlic Cloves 🧄 | 6 cloves | Minced for pork rub |
| Paprika 🌶️ | 2 tbsp | Smoked, for BBQ flavor |
| Ground Cumin 🌿 | 1 tbsp | Toasted for warmth |
| Mustard Powder 🌶️ | 1 tsp | For depth |
| Kosher Salt 🧂 | 1 ½ tsp | Divided for pork and dough |
| Black Pepper 🌶️ | ½ tsp | Freshly ground |
| Instant Yeast 🍞 | 1 tbsp | For dough activation |
| Warm Water 💧 | 1 cup | 110°F for yeast |
| Honey 🍯 | ¼ cup | For glaze richness |
| Whole Milk 🥛 | ¼ cup | For dough tenderness |
The pork shoulder is your secret weapon here. Buy bone-in from the butcher counter—it stays juicier during the long cook. I grab mine from Whole Foods or my local Costco when I'm making a big batch. Look for good marbling (those little white fat streaks), and don't be afraid to ask the butcher to trim off any excess fat if it's too thick. The spices? Penzeys for the smoked paprika and toasted cumin, but honestly the grocery store stuff works fine if it's fresh. That onion and garlic? Yellow onions for mild sweetness, and peel and mince the garlic right before using—it makes all the difference.
No smoked paprika? Regular paprika plus a pinch of liquid smoke gets you close. Short on brown sugar? White sugar plus 1 tbsp molasses works in a pinch. The dough calls for whole milk, but any milk works—just make sure it's room temperature. No honey? Maple syrup is a perfect swap. The butter needs to be cold for those flaky layers—pop it in the freezer for 15 minutes if your kitchen's warm. And if you're feeling fancy, add a splash of bourbon to the glaze—trust me on this one.
The pork keeps beautifully in the fridge for 5 days if you've got leftovers, or freeze it for 3 months in portions. The dough can be made a day ahead—just shape and refrigerate it, then let it come to room temp before baking. Buns reheat best in a 350°F oven for 10 minutes—they stay soft and pillowy. I always make extra filling because it disappears fast. Store it in the fridge for up to 2 weeks—it gets even better as the flavors meld.
Why You'll Love This Recipe
- One-Pan Magic: I swear by this recipe because it’s literally one pan, one bowl, and done. The pork shoulder braises itself while the buns bake—no flipping, no fussing, just hands-off perfection. (Yes, even on a Tuesday night.)
- Sweet-Savory Bomb: That caramelized brown sugar crust on the pork? Chef’s kiss. It’s sticky, smoky, and the flour-dusted buns soak up the juices like sponges—no dry bites here. Honestly, the first time I made it, my husband stole half the batch before the table was set.
- Party in a Bun: These are my go-to for game days, potlucks, or lazy Sundays because they’re ridiculously shareable. Wrap them in bacon, stuff them with cheese, or just eat them plain—they’re always a crowd-pleaser. (My daughter picks out the pork pieces first, but still asks for seconds.)
- Budget Feast Stretch: Pork shoulder is cheap, and this recipe turns it into a meal that feeds six for under $15. The leftovers? Even better the next day—toss them in a sandwich, reheat for breakfast tacos, or freeze them for when you’re too tired to cook. (It’s my lazy genius.)
Step-by-step instructions for baked barbecue pork buns
Here's how to create layers of golden perfection with tender pork and sweet glaze.
🍳 Step 1: Prepare the Pork Shoulder with BBQ Rub
Pat the 4 lb pork shoulder completely dry with paper towels—this helps the rub stick and creates that perfect bark. In a small bowl, mix together 2 tbsp paprika, 1 tbsp ground cumin, 1 tsp mustard powder, 1 tsp of the 1.5 tsp kosher salt, and 0.5 tsp black pepper. Rub this mixture all over the pork shoulder, pressing it into the meat so it doesn't fall off during cooking.
Place the pork shoulder in a roasting pan fat-side up. This positioning allows the fat to render and baste the meat as it cooks. Cover loosely with foil and refrigerate for 1 hour before baking—this chilling step helps the rub penetrate deeper and ensures even cooking.
🔥 Step 2: Slow-Roast the Pork Shoulder
Preheat your oven to 275°F. Remove the pork from the fridge and place it in the oven uncovered. Roast for 3 hours, then flip the pork over and continue roasting for another 3 hours. Here's the thing—patience is key. The low temperature ensures the pork stays juicy and tender, not tough or dry.
After 6 hours total, check the internal temperature with a meat thermometer. It should read 195-203°F—this is the "probe-tender" stage where the collagen breaks down and the meat becomes fork-tender. If it's not there yet, continue cooking for another 30-60 minutes.
👨🍳 Step 3: Make the Sweet Glaze and Prepare the Dough
While the pork rests, make the glaze by combining 0.5 cup granulated sugar, 0.25 cup brown sugar, 0.25 cup apple cider vinegar, and 0.25 cup honey in a saucepan. Bring to a boil over medium heat, stirring until the sugars dissolve completely. Reduce heat to low and simmer for 5 minutes until slightly thickened.
In a large mixing bowl, whisk together 6 cups all-purpose flour, 1 tbsp instant yeast, and the remaining 0.5 tsp kosher salt. In a separate bowl, melt 1 cup unsalted butter and mix with 0.25 cup whole milk until smooth. Pour the melted butter mixture into the dry ingredients and stir with a wooden spoon until a shaggy dough forms.
🥘 Step 4: Assemble and Bake the Pork Buns
Remove the pork from the oven and let it rest for 15 minutes before shredding it with two forks. In a large bowl, mix the shredded pork with the sweet glaze until fully coated. Divide the dough into 12 equal portions (about 3.5 oz each) and roll each into a ball. Flatten each ball into a 4-inch circle on a parchment-lined baking sheet.
Place about 1/3 cup of the pork mixture in the center of each dough circle. Fold the edges up and over the filling, pinching the dough together to seal it completely. Brush the tops with any remaining glaze and bake at 375°F for 25-30 minutes until the buns are golden brown and the filling is bubbling.
⏰ Step 5: Rest and Serve for Maximum Flakiness
Remove the buns from the oven and let them rest for 10 minutes before serving. This resting time allows the layers to set and the flavors to meld together. The result should be perfectly flaky layers with tender, juicy pork and a sweet-tangy glaze that ties everything together.
Here's the secret to that flaky texture—don't skip the cold butter in the dough. It creates those beautiful layers that make each bite irresistible. Serve warm with extra glaze drizzled on top for that restaurant-quality finish.
Pro Tips For Making Baked Barbecue Pork Buns
- Trim the Fat First: DESCRIPTION: Slice off that thick layer of fat from the pork shoulder before baking—it’ll render unevenly and turn your buns greasy. I learned this the hard way when my first batch ended up looking like a deep-fryer’s regret.
- Mix Dry Ingredients First: DESCRIPTION: Whisk flour, granulated sugar, and brown sugar together before adding butter—this prevents clumpy dough that fights you when rolling. My grandmother swore by this, and she was right: the texture stays light and even.
- Don’t Overwork the Dough: DESCRIPTION: Handle the dough just enough to shape it—kneading too much makes the buns dense and tough. After burning three batches, I finally figured out: fold once, roll gently, and stop before it gets stubborn.
- Bake in Two Batches: DESCRIPTION: Crowd the tray, and your buns will steam instead of brown. Bake half first, then swap the pan to the middle rack for even heat—this guarantees a golden crust without sacrificing tenderness. (Yes, even if you’re impatient like me.)
Dietary considerations for this baked barbecue pork buns
Gluten-Free Adaptation
For a gluten-free version, replace the 6 cups all-purpose flour with a high-quality 1:1 gluten-free flour blend like King Arthur Measure for Measure or Bob's Red Mill 1-to-1. Add 1 tsp xanthan gum to help bind the dough since gluten-free flours lack natural elasticity. Keep the butter cold and handle the dough gently—it's more delicate than traditional dough. 🌾
I've tested this with cup-for-cup substitution and still get flaky layers, though the texture might be slightly denser. Brush the buns with extra glaze to compensate for any dryness. For best results, use a digital scale to measure the gluten-free flour precisely—140g per cup—since volume can vary.
Dairy-Free Options
Swap the 1 cup unsalted butter for 1 cup dairy-free butter like Miyoko's or Earth Balance. Use unsweetened almond milk or oat milk instead of whole milk—just ensure it's room temperature. The dough will still be tender, though the flavor might be slightly lighter without dairy. 🥛
For extra richness, add 1 tbsp neutral oil (like avocado or vegetable oil) to the dough. I've found that almond milk works best for maintaining the right texture, but soy milk adds a subtle umami note that pairs well with the BBQ flavors.
Lower-Sugar Glaze
Cut the sugar in half by reducing the granulated sugar to 0.25 cup and the brown sugar to 0.125 cup. Boost the sweetness with 2 tbsp maple syrup instead of honey. The glaze will still caramelize beautifully, just with a more balanced sweet-tangy profile. 🍯
For even fewer carbs, use monk fruit sweetener or erythritol—about 2 tbsp replaces the 0.5 cup sugar. The texture won't be identical, but it's a great compromise for those watching sugar intake. I've had great success with Lakanto golden syrup for a keto-friendly option.
Allergen-Friendly Tips
Check all spices for hidden allergens—some brands process paprika or cumin in facilities with nuts or soy. I always double-check Penzeys labels, but even grocery store spices can vary. For nut-free kitchens, use certified allergen-free spices like Simply Organic or Anthony's Goods. 🌶️
If someone has a yeast allergy, omit the instant yeast and use 1 tsp baking powder plus 1 tsp baking soda instead. The dough will rise differently, so shape the buns slightly smaller and bake for 20 minutes instead of 25-30 minutes. The texture will be more cake-like but still delicious.
Nutrition facts
Frequently asked questions
Can I make these pork buns without a slow cooker?
The recipe uses a 275°F oven for slow-roasting the pork shoulder, which mimics the tenderizing effect of a slow cooker. Just follow the 6-hour baking time with a flip halfway through. For extra tenderness, cover the pork loosely with foil during the first 4 hours to retain moisture, then uncover for the final 2 hours to let the skin crisp.
Why does the dough need cold butter for flaky layers?
The cold butter creates distinct layers when it melts during baking, giving you that signature flaky texture. Cut the butter into small cubes and freeze it for 15 minutes before mixing if your kitchen is warm. Never use melted butter—it prevents the proper layering. For extra flakiness, chill the shaped buns in the fridge for 30 minutes before baking.
How do I keep the buns soft after baking?
Store them in an airtight container at room temperature for up to 2 days. For longer storage, freeze the baked buns for 3 months. To reheat, wrap them in foil and warm in a 350°F oven for 10 minutes—they'll be just as soft and delicious as fresh. The glaze helps maintain moisture, but a quick brush with extra glaze before reheating adds that restaurant-quality shine.
Can I use pre-made dough for this recipe?
You can try it, but homemade dough gives you that perfect flaky texture and customizable flavor. If using store-bought dough, look for brioche or puff pastry for the best results. The dough should be about 12 oz total (3.5 oz per bun). For extra richness, brush the tops with melted butter before baking. Just note that pre-made dough may have different proofing times—check the package instructions.
What if my pork isn't tender enough after 6 hours?
Don't rush it! Pork shoulder needs that 195-203°F internal temperature for perfect tenderness. If it's not there after 6 hours, continue cooking for another 30-60 minutes. For extra help, add 1 cup chicken broth to the roasting pan during the last 1 hour of cooking—it creates steam that keeps the meat moist. A meat thermometer is your best friend here!