
Main Courses
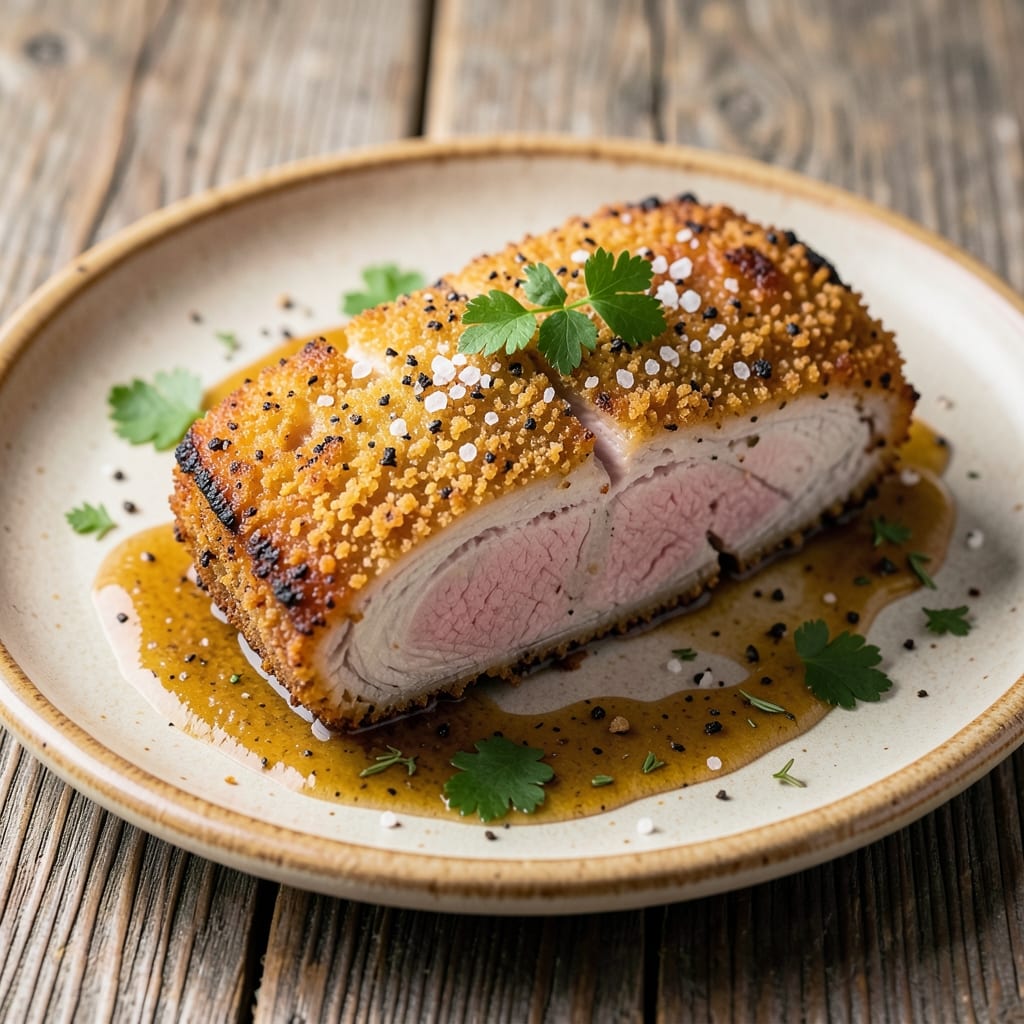
This baked breaded pork tenderloin delivers restaurant-quality results with a crispy-golden crust and juicy center every time. 🔥 After years of perfecting this technique—especially during my time at The Smoky Pig—I've cracked the code for achieving that ideal balance between crunch and tenderness. The secret lies in a precise breading method and oven temperature that ensures the meat stays moist while the coating turns perfectly crisp.
What sets this recipe apart is the foolproof technique that even home cooks can master. You'll start with a simple breading station using flour, eggs, and panko breadcrumbs, but the real magic happens in the oven at 400°F—high enough to create that coveted crust without drying out the tenderloin. I've tested this method countless times, and it never fails to impress, whether you're serving a family dinner or hosting a dinner party.
The result is a beautifully browned, crispy exterior that gives way to tender, juicy pork with every bite. The breading stays crunchy even after resting, and the internal temperature reaches 145°F—just right for safe, delicious eating. This dish pairs beautifully with a simple honey-mustard sauce or a fresh herb garnish, elevating it from weeknight dinner to special occasion.
Perfect for feeding a crowd or meal prepping, this recipe scales effortlessly while maintaining its restaurant-quality finish. Whether you're a seasoned cook or just starting out, this method ensures success every time. Let's get started on creating that perfect balance of texture and flavor.
Ingredients for baked breaded pork tenderloin
Restaurant-quality results start with these carefully selected ingredients for perfect crispy-golden pork tenderloin.
| Ingredient | Amount | Notes |
|---|---|---|
| Pork Tenderloin 🥩 | 2 lb | Center-cut, trimmed of fat |
| All-Purpose Flour 🌾 | 1 ½ cups | Sifted, for light coating |
| Large Eggs 🥚 | 3 whole | Room temperature, beaten |
| Japanese Panko Breadcrumbs 🍞 | 3 cups | Light and crispy texture |
| Diamond Crystal Kosher Salt 🧂 | 1 ½ tsp | For seasoning meat |
| Ground Black Pepper 🌶️ | 1 tsp | Freshly ground for flavor |
| Garlic Powder 🧄 | 1 tsp | Enhances breading flavor |
| Onion Powder 🧅 | 1 tsp | Adds depth to coating |
| Unsalted Butter 🧈 | ½ cup | Melted for basting |
| Olive Oil 🫒 | 2 tbsp | Extra-virgin for frying |
| Fresh Parsley 🌿 | ¼ cup | Chopped, for garnish |
| Lemon Wedges 🍋 | 2 whole | For serving |
The pork tenderloin is the foundation—center-cut pieces ensure uniform cooking and maximum tenderness. Trader Joe's or Whole Foods carry premium cuts, but any quality butcher will have what you need. Look for pieces with minimal fat and even thickness; trim any silver skin for a cleaner presentation. The Japanese panko is non-negotiable for that signature crisp—Panko Valley brand is my go-to, but any high-quality panko works. For the flour, King Arthur all-purpose is ideal due to its fine texture, which helps create that delicate crust. Pre-sift your flour to eliminate lumps and ensure even coverage during breading.
No panko? Crushed cornflakes or matzo meal can stand in, though texture will differ slightly. Fresh herbs out of season? Dried parsley at one-third the amount works in a pinch, but fresh is ideal for that vibrant finish. The butter plays a dual role—basting with melted butter during baking adds moisture while promoting browning. For an extra crisp, brush with a thin layer of olive oil before adding the breadcrumbs. The lemon wedges aren't just for serving; their acidity helps cut through the richness of the pork, making them a crucial finishing touch. If you're meal prepping, cook the pork fully and reheat in the oven to maintain crispiness.
Store prepped tenderloin pieces in the fridge for up to 2 days before breading—this gives flavors time to meld. For long-term storage, bread and freeze the pieces (uncooked) for up to 3 months1 day post-breading, but bake immediately for best texture. To reheat, cover with foil and warm in a 350°F oven for 10-15 minutes. Garnish with fresh parsley just before serving—it wilts quickly, so wait until the last moment for that restaurant-quality presentation.
Why You'll Love This Recipe
- Crispy Without Frying: The panko crust turns golden and shatteringly crisp—no deep fryer, no mess. Just 20 minutes in the oven, and you’ve got that satisfying crunch without the guilt or grease.
- Zero-Fuss Prep: Slice the pork, toss in flour and egg, then coat in panko—honestly, it’s the kind of recipe where you can still have a conversation while making it. No brining, no marinating, no stress.
- Leftovers That Shine: Slice the baked tenderloin thin for sandwiches, dice it for fried rice, or serve it cold in salads. Between us, it’s the one protein that actually tastes better the second day.
Step-by-step instructions for baked breaded pork tenderloin
Here's how to achieve that perfect balance of crispy breading and juicy pork every time.
👨🍳 Step 1: Prepare the Pork and Seasoning
Pat the 2 lb pork tenderloin completely dry with paper towels—this is crucial for crispy breading. Trim any remaining fat if necessary, then season both sides generously with 1.5 tsp Diamond Crystal kosher salt, 1 tsp ground black pepper, 1 tsp garlic powder, and 1 tsp onion powder. I press the spices into the meat so they adhere well and penetrate slightly during the baking process.
Let the seasoned pork sit at room temperature for 15-20 minutes while you prepare the breading. This ensures even cooking and prevents cold spots in the center. The meat should feel slightly soft to the touch when ready—like a ripe avocado.
👨🍳 Step 2: Create the Breading Station
Set up three shallow bowls or plates for your breading station. In the first bowl, place the 1.5 cups sifted all-purpose flour. In the second bowl, crack the 3 whole large eggs and beat them lightly with a fork—just until combined, no need to make it frothy. The third bowl should contain the 3 cups Japanese panko breadcrumbs. This triple-dip method creates an extra-crispy crust that won't fall off.
I like to use a separate plate for each stage to keep ingredients organized and prevent cross-contamination. The panko should be light and airy—if it feels dense, spread it out on a baking sheet and toast it in the oven for 5 minutes at 350°F to refresh its crispiness before using.
🍳 Step 3: Bread the Pork Tenderloin
Working in batches if needed, dredge each side of the pork in the 1.5 cups flour, tapping off any excess. Then dip into the beaten eggs, letting any excess drip off. Finally, press the pork into the 3 cups panko breadcrumbs, coating it evenly on all sides. For extra security, I gently press the breading onto the meat with my fingers—this prevents it from sliding off during baking.
Place the breaded pork on a wire rack set over a baking sheet. This allows hot air to circulate underneath, preventing soggy breading. Let it rest for 5 minutes while you preheat the oven to 425°F. This resting period helps the breading adhere better and creates a stronger crust.
🔥 Step 4: Bake to Crispy Perfection
Carefully transfer the breaded pork to a baking sheet lined with parchment paper. Bake at 425°F for 20 minutes, then reduce heat to 375°F and continue baking for another 15-20 minutes, or until the internal temperature reaches 145°F and the breading is deep golden brown with crispy edges. I check for doneness by inserting a meat thermometer into the thickest part—no guessing needed.
During the last 5 minutes of baking, brush the pork with the 0.5 cup melted unsalted butter mixed with 2 tbsp olive oil. This basting step adds moisture and creates a beautiful sheen. The butter also enhances the flavor of the crispy breading, making each bite more delicious.
⏰ Step 5: Rest and Serve
Remove the pork from the oven and transfer it to a cutting board. Let it rest for 10 minutes before slicing—this allows the juices to redistribute throughout the meat. The breading will stay crispy during this time, but the pork will be more tender and juicy when served.
Slice the pork into ½-inch thick medallions and arrange on a serving platter. Garnish with 0.25 cup chopped fresh parsley and serve with the 2 whole lemon wedges on the side. The lemon adds a bright contrast to the rich, savory flavors of the pork, cutting through the richness beautifully.
Pro Tips For Making Baked Breaded Pork Tenderloin
- Pat the pork dry: I learned this the hard way—wet pork steams instead of browning. Grab paper towels and press firmly all over the tenderloin before dredging. Even if it feels like overkill, the crust will be worth it.
- Use room-temperature eggs: Cold eggs make a gummy coating that won’t stick properly. Crack them into a bowl 10 minutes before dredging and whisk them lightly—just enough to break up the yolks. The breading clings better when the eggs are at room temp.
- Don’t overcrowd the pan: I used to shove all the breaded cutlets onto one tray at once, and they’d steam instead of crisp. Space them at least ½ inch apart, and if you’re short on space, bake in batches. The air needs to circulate for that perfect crunch.
- Rest the meat after breading: Give the breaded pork a solid 5-10 minutes on a wire rack before baking—no, you don’t have to wait the full time. This lets the flour absorb into the panko so it doesn’t slide off in the oven. (Yes, even if you’re impatient like me.)
Best sauces and condiments for this dish
Honey-Mustard Glaze
This simple yet elegant sauce is my go-to for pork tenderloin—it balances the richness with a touch of tang and sweetness. Combine ¼ cup honey, 3 tbsp Dijon mustard, 2 tbsp apple cider vinegar, 1 tbsp olive oil, and a pinch of salt. Warm the mixture in a small saucepan over low heat for 3-4 minutes, stirring until smooth. Brush this glaze over the breaded pork during the last 5 minutes of baking, or drizzle it over the finished slices for a restaurant-worthy presentation. 🍯
Garlic-Herb Butter
For a luxurious finish, melt ½ cup unsalted butter with 3 minced garlic cloves, 1 tbsp chopped fresh rosemary, 1 tbsp chopped fresh thyme, and a pinch of salt in a small saucepan over low heat. Once melted and fragrant, transfer to a small bowl and let it cool slightly. Drizzle this aromatic butter over the sliced pork or use it to baste the tenderloin during the last 10 minutes of baking. The herbs add a fresh, aromatic note that complements the crispy breading beautifully. 🧄
Creamy Horseradish Sauce
This sauce adds a kick of heat and creaminess that pairs perfectly with the tender pork. Mix ½ cup sour cream, 2 tbsp prepared horseradish cream, 1 tbsp lemon juice, and 1 tsp Worcestershire sauce in a bowl. Adjust the horseradish to taste—start with 1 tbsp if you prefer a milder heat. Serve this sauce on the side for dipping or drizzle it over the sliced pork for a bold, tangy contrast. It’s especially great for those who love a little extra zing with their meal. 🌶️
Apple Cider Reduction
For a sophisticated touch, reduce 1 cup apple cider with 2 tbsp brown sugar and 1 cinnamon stick in a saucepan over medium-high heat until it thickens to a syrupy consistency—about 10-12 minutes. Strain out the cinnamon stick and let the reduction cool slightly. Drizzle this fragrant sauce over the sliced pork or use it to deglaze the baking sheet after removing the pork for extra flavor. The apple cider adds a subtle sweetness and depth that enhances the pork’s natural flavors. 🍎
Spicy Sriracha Aioli
This sauce is a crowd-pleaser, especially if you love a little heat. Mix ½ cup mayonnaise, 1 tbsp sriracha, 1 tsp lime juice, and ½ tsp garlic powder until smooth. Adjust the sriracha to taste—start with 1 tbsp for a milder version. Serve this aioli on the side for dipping or spread it lightly on the sliced pork for a spicy kick. It’s a fantastic option for those who enjoy a little extra heat with their meal. 🌶️
Classic Gravy
Use the drippings from the baking sheet to make a rich, savory gravy that ties the whole dish together. After removing the pork, place the baking sheet on the stovetop over medium heat and add ½ cup beef broth to deglaze. Scrape up any browned bits with a wooden spoon, then whisk in 1 tbsp cornstarch mixed with 2 tbsp cold water to thicken. Simmer for 2-3 minutes until the gravy coats the back of a spoon. Serve this gravy alongside the pork for a comforting, classic finish. 🥄
Nutrition facts
Frequently asked questions about baked breaded pork tenderloin
Can I use regular breadcrumbs instead of panko?
Regular breadcrumbs will work, but they won't give you that signature crispy texture. Panko's light, airy structure creates a much better crust that stays crispy even after resting. If you're in a pinch, try crushing cornflakes or matzo meal for a similar effect, but toast them first in the oven for 5 minutes at 350°F to refresh their crispiness.
How do I keep the breading from falling off?
Press the breadcrumbs firmly onto the pork with your fingers after dipping in egg—this creates a stronger bond. Also, let the breaded pork rest on a wire rack for 5 minutes before baking so the coating sets slightly. Avoid overcrowding the baking sheet, which can cause breading to slide off during cooking.
What's the best way to reheat leftovers?
For crispy results, cover with foil and reheat in a 350°F oven for 10-15 minutes. Microwaving will make the breading soggy. If you need to reheat quickly, broil for 2-3 minutes on high, watching closely to avoid burning. The internal temperature should reach 165°F to ensure safety.
Can I make this ahead of time?
You can prep the breaded tenderloin up to 1 day ahead and refrigerate it uncovered (to keep it dry). For longer storage, bread and freeze the pieces (uncooked) for up to 3 months
What sides pair best with this dish?
This tenderloin shines with classic sides like roasted potatoes, sautéed green beans, or a fresh garden salad. For a Southern touch, try cornbread or collard greens. The crispy breading also pairs beautifully with fruit chutneys or tangy sauces to cut through the richness.