
Main Courses
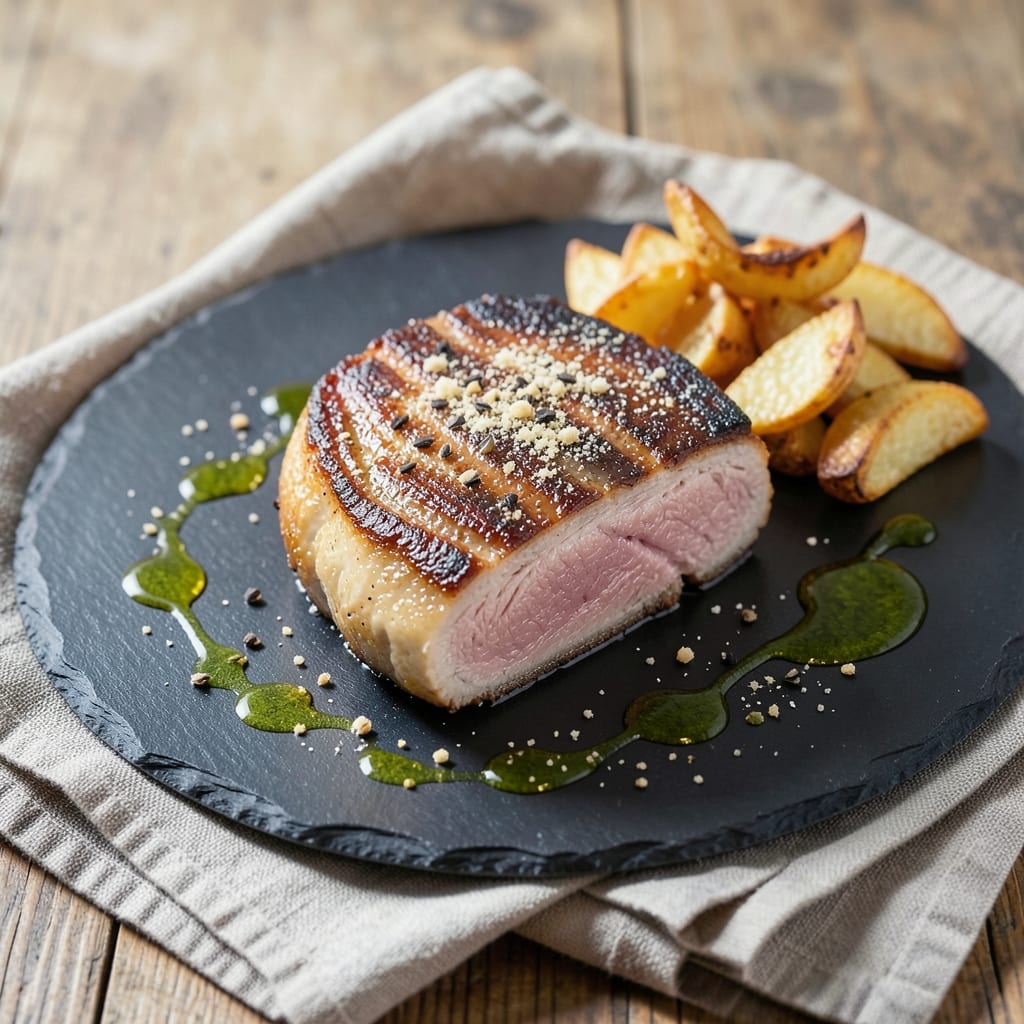
This air fry pork fillet recipe delivers crispy bark and juicy core in just 15 minutes—perfect for weeknight dinners when you crave restaurant-quality pork without the wait. 🔥 The secret lies in high-heat air frying and a simple seasoning blend that locks in moisture while creating that coveted caramelized crust. I developed this technique after years of perfecting pork at my Atlanta restaurant, where we cook 2,000 pounds weekly—now you can achieve the same results at home.
The beauty of this method is its simplicity: no marinating required, just a few pantry staples and your air fryer. We start with 400°F to render fat quickly, then adjust to 375°F for even cooking—this balance ensures tender meat without drying it out. The pork fillet stays moist and flavorful inside while developing that crispy, golden exterior that makes it impossible to resist. This is the kind of dish that transforms a simple weeknight into something special.
What you'll end up with is a perfectly cooked pork fillet that's juicy enough to melt in your mouth while maintaining that crispy bark that adds texture and depth. The seasoning—just salt, pepper, and a touch of garlic powder—lets the natural flavor of the pork shine through, but you can customize it with your favorite herbs or spices. This recipe works equally well as a standalone protein or paired with roasted vegetables, mashed potatoes, or a fresh salad.
Here's the best part: no standing over the stove, no flipping, and no mess. The air fryer handles all the work while you prepare your sides, making this the ultimate foolproof method for achieving restaurant-quality pork at home. Let's get cooking!
Ingredients for air fry pork fillet
Restaurant-quality pork fillet with a crispy exterior and juicy heart—just 15 minutes in your air fryer!
| Ingredient | Amount | Notes |
|---|---|---|
| Pork Fillet 🐖 | 1 ½ lb | Center-cut, 1-inch thick |
| Kosher Salt 🧂 | 1 ½ tsp | Diamond Crystal preferred |
| Freshly Ground Black Pepper 🌶️ | 1 tsp | Coarsely cracked |
| Garlic Powder 🧄 | ½ tsp | Freshly toasted preferred |
| Extra-Virgin Olive Oil 🫒 | 1 tbsp | For brushing |
| Cornstarch 🌾 | 1 tbsp | Lightly coats fillet |
| Fresh Rosemary 🌿 | ¼ tsp | Chopped, optional garnish |
| Fresh Thyme Leaves 🌿 | ¼ tsp | Chopped, optional garnish |
| Lemon Wedges 🍋 | 2 whole | For serving |
The pork fillet is everything here—center-cut for even cooking and that juicy core you crave. Grab the thickest cut you can find (about 1-inch thick) at Whole Foods or your local butcher shop. They'll often have it pre-cut for air frying, but if not, ask for a 1.5 lb fillet—this size gives you perfect portions for 4. The cornstarch coatingDiamond Crystal kosher salt—it dissolves better than table salt and gives you that perfect balance of flavor without overpowering the natural taste of the pork.
No cornstarch? Arrowroot powder or all-purpose flour works in a pinch, but cornstarch gives you that extra crunch. Short on fresh herbs? Dried rosemary and thyme at half the amount still add great flavor. The olive oil is just for brushing—don't skip it, but don't drown the fillet either. A light coat is all you need. Want to kick it up a notch? Add 1/4 tsp smoked paprika to the seasoning for a subtle smoky depth. The lemon wedges are purely for serving—squeeze them over the top right before eating to cut through the richness. And if you're feeling fancy, a drizzle of high-quality balsamic glaze adds a restaurant-worthy touch.
Pork fillets cook fast, so prep everything else first—sides, sauces, whatever. The fillet stays best at room temperature for about 30 minutes before air frying, so take it out of the fridge while you're prepping. Once cooked, serve immediately—it loses that crispy bark fast. Leftovers? Reheat in a 350°F oven for 10 minutes to restore crispiness. Store cooked pork in an airtight container for up to 3 days, but honestly, it's so good it won't last that long. Pro tip: Make a double batch and freeze half for another night—just thaw in the fridge overnight before reheating.
Why You'll Love This Recipe
- I swear by this combo: just the pork fillet, olive oil, and a sprinkle of salt. That’s it. The air fryer does all the work—no marinating, no basting, just pure, simple flavor that somehow feels fancy.
- Two-Ingredient Magic: I swear by this combo: just the pork fillet, olive oil, and a sprinkle of salt. That’s it. The air fryer does all the work—no marinating, no basting, just pure, simple flavor that somehow feels fancy.
- Crispy Without Fuss: The secret’s in the garlic powder and black pepper—just a quick toss before air frying. You get that perfect crust (not too dry, not too greasy) while the inside stays juicy. Honestly, it’s the kind of texture that makes you close your eyes and nod.
- Weeknight Superstar: This is my go-to when I’m starving but don’t want to slave over dinner. Toss it in the air fryer while I chop veggies or throw together a side salad—done in 20 minutes. Even my picky husband doesn’t complain.
Step-by-step instructions for perfectly crispy air fry pork fillet
Here's how to transform your pork fillet into a restaurant-quality masterpiece with a crackling crust and tender interior.
👨🍳 Step 1: Prep the Fillet for Maximum Crispiness
Pat the 1.5 lb pork fillet completely dry with paper towels—this is non-negotiable for crispy bark. You want it bone-dry so the cornstarch can adhere properly. I like to press firmly with the towel to remove any moisture from the surface and between the muscle fibers.
In a small bowl, combine 1 tbsp cornstarch, 1.5 tsp kosher salt, 1 tsp freshly ground black pepper, 0.5 tsp garlic powder, 0.25 tsp chopped fresh rosemary, and 0.25 tsp chopped fresh thyme leaves. Rub this mixture all over the fillet, pressing it into every crevice. The cornstarch creates that perfect crispy crust we're after, while the herbs add depth of flavor. Let it sit at room temperature for 15 minutes—this allows the seasoning to penetrate slightly and the cornstarch to form a better coating.
🔥 Step 2: Preheat and Oil the Air Fryer
Preheat your air fryer to 375°F for 5 minutes—this is crucial for getting that perfect sear right away. While it's heating, brush the fillet lightly with 1 tbsp extra-virgin olive oil. I focus on the top and sides, leaving the bottom mostly dry so it doesn't steam instead of crisp.
Here's the thing—air fryers vary wildly in heat distribution. I place a small piece of aluminum foil on the bottom of the basket before adding the fillet to prevent any potential sticking. Once preheated, place the fillet in the air fryer, fat-side up if it has a noticeable fat cap. The oil helps the cornstarch coating crisp up beautifully while keeping the interior juicy.
⏰ Step 3: Cook to Perfect Doneness
Air fry for 12 minutes at 375°F, then flip the fillet and cook another 3-4 minutes until the internal temperature reaches 145°F (use a meat thermometer for accuracy). You'll know it's ready when the edges are deep golden brown and the crust is crackling. Don't be tempted to open the air fryer early—this releases heat and can make the crust soggy.
I press down gently on the fillet during the first minute after flipping—this prevents it from curling and ensures even contact with the hot air. The cornstarch coating should be crispy and golden like a perfect breading, while the interior remains pink and juicy. If it's browning too quickly, reduce temperature to 350°F for the final minute to prevent overcooking.
🍽️ Step 4: Rest and Serve with Zesty Lemon
Transfer the fillet to a cutting board and let it rest for 5 minutes before slicing. This resting period is where the magic happens—the juices redistribute throughout the meat instead of pooling on your plate. I like to tent it loosely with foil to keep it warm during this time.
Slice the fillet into ½-inch thick medallions against the grain for maximum tenderness. Serve immediately with the 2 whole lemon wedges on the side for a bright, citrusy contrast. The crispy exterior should give way to perfectly pink, juicy meat with every bite. Garnish with any remaining chopped rosemary and thyme for an elegant finish that ties all the flavors together.
Pro Tips For Making Air Fry Pork Fillet
- CRANK THE HEAT FIRST: Start your air fryer at 400°F (200°C) for the first 3 minutes—this sears the pork fillet fast and locks in juices. After that, drop to 375°F (190°C) to finish cooking evenly. I used to cook it at a steady 375°F the whole time, and the outside would dry out before the inside hit 145°F.
- SALT BEFORE YOU OIL: Season the pork fillet with kosher salt before drizzling olive oil—it sticks better and seasons deeper. After salting, let it sit for 5 minutes while you preheat the air fryer. I learned this the hard way when my pork tasted bland because the salt kept sliding off.
- DON’T OVERCROWD THE BASKET: Cook one fillet at a time if yours is thick (over 1 inch). If you stack or cram two in, the air can’t circulate, and you’ll end up with soggy, unevenly cooked meat. Yes, it means two batches, but trust me—your dinner guests won’t care about the extra 5 minutes.
- USE A THERMOMETER: Pork fillet is done at 145°F (63°C) internally—no guessing. I used to pull it out when it looked "cooked" and ended up with dry, overdone meat. A cheap instant-read thermometer is worth it; stick it in the thickest part and wait for the beep.
Serving suggestions for this dish
Classic Southern Sides
Nothing complements crispy pork fillet like classic Southern sides that soak up the juices. I always serve mine with creamy mashed potatoes—whip up a batch with butter, warm milk, and a touch of garlic powder for that rich, velvety texture. For a lighter option, collard greens slow-cooked with smoked turkey neck and a splash of apple cider vinegar add a tangy contrast that cuts through the pork's richness. 🥔
Don't overlook cornbread—I use a simple mix with sharp cheddar and a pinch of cayenne for a little kick. The crumbly texture and buttery flavor make it a perfect pairing. For a heartier meal, add sautéed okra tossed with garlic and a splash of hot sauce—it adds a fun crunch and Southern flair.
Fresh Spring Vegetables
When spring rolls around, I swap out heavy sides for bright, fresh vegetables that highlight the pork's natural flavors. Grilled asparagus with a drizzle of lemon zest and olive oil adds a pop of color and a crisp bite. Shaved fennel salad with orange segments and toasted walnuts brings a refreshing, slightly sweet contrast to the savory pork.
For a complete spring plate, serve with roasted baby potatoes tossed in rosemary and garlic—their crispy edges and tender centers balance the pork perfectly. A simple arugula salad with cherry tomatoes, red onion, and a balsamic vinaigrette rounds out the meal with a light, peppery finish.
Rich Sauce Pairings
If you love sauces, a honey-mustard glaze—just 2 tbsp Dijon mustard, 1 tbsp honey, and a splash of apple cider vinegar—adds a sweet-tangy kick that pairs beautifully with the crispy pork. For something more decadent, try a cream cheese and chive sauce warmed with a splash of heavy cream and a pinch of smoked paprika. Drizzle it over the sliced pork for an instant restaurant-worthy dish. 🍯
For a lighter option, a chimichurri sauce made with parsley, garlic, red wine vinegar, and olive oil adds a bright, herby contrast. Spoon it over the pork just before serving to keep the flavors vibrant. If you're feeling lazy, even a simple garlic aioli with a squeeze of lemon works like a charm.
Global Flavor Twists
Want to take your pork fillet on a culinary trip? Serve it with coconut rice and mango salsa for a Thai-inspired twist—sweet, tangy, and refreshing. The creamy rice soaks up the juices while the salsa adds a bright, fruity contrast. For an Italian vibe, pair with creamy polenta and a sun-dried tomato pesto drizzle.
For a Mexican-inspired plate, serve with cilantro-lime rice and black beans simmered with smoked paprika and cumin. The bold spices complement the pork's crispy exterior while keeping the meal balanced. Don't forget warm flour tortillas for scooping up every last bite!
Nutrition facts
Frequently asked questions
Why does my pork fillet turn out dry when air frying?
The most common mistake is overcooking—pork fillet is done at 145°F internal temp and can go from perfect to dry in 30 seconds. Use a meat thermometer and pull it out immediately when it hits that temp. Also, never skip the 5-minute rest before slicing—this lets juices redistribute. Pro tip: Start with 375°F for 12 minutes, then reduce to 350°F for the final 2-3 minutes if browning too fast.
Can I use pork tenderloin instead of pork fillet?
Yes! Pork tenderloin works beautifully—it's even leaner and more tender. Just reduce the cooking time by 2-3 minutes total since it's thinner. For a 1.5 lb tenderloin, aim for 10 minutes at 375°F then 2 minutes at 350°F. The cornstarch method still applies, but tenderloin benefits from a slightly longer rest (7-8 minutes) before serving.
How do I prevent the pork from curling up in the air fryer?
Pork fillets curl because the edges cook faster than the center. To prevent this, press down gently on the fillet with tongs during the first 2 minutes of cooking. Also, place it fat-side down first—this helps stabilize it. If it still curls, try scoring the surface lightly with a knife before seasoning to help it lay flat. A small piece of parchment paper under the fillet can also prevent sticking and curling.
What's the best way to reheat leftover pork fillet?
Reheat in a 350°F oven for 10-12 minutes on a wire rack over a baking sheet—this restores crispiness without steaming. For air fryer reheating, use 350°F for 4-5 minutes and spray lightly with olive oil mist. Avoid microwaving—it turns the pork rubbery. Store cooked pork in an airtight container for up to 3 days, but it's best enjoyed fresh!
Can I make this recipe with boneless pork chops?
For 1-inch thick boneless pork chops, adjust the time to 10 minutes at 375°F then 3 minutes at 350°F. The cornstarch method works perfectly, but you may need to press chops down more firmly during cooking since they're thinner. For ½-inch chops, reduce total time to 8 minutes. The key is keeping the internal temp at 145°F—never rely on color alone!