
Main Courses
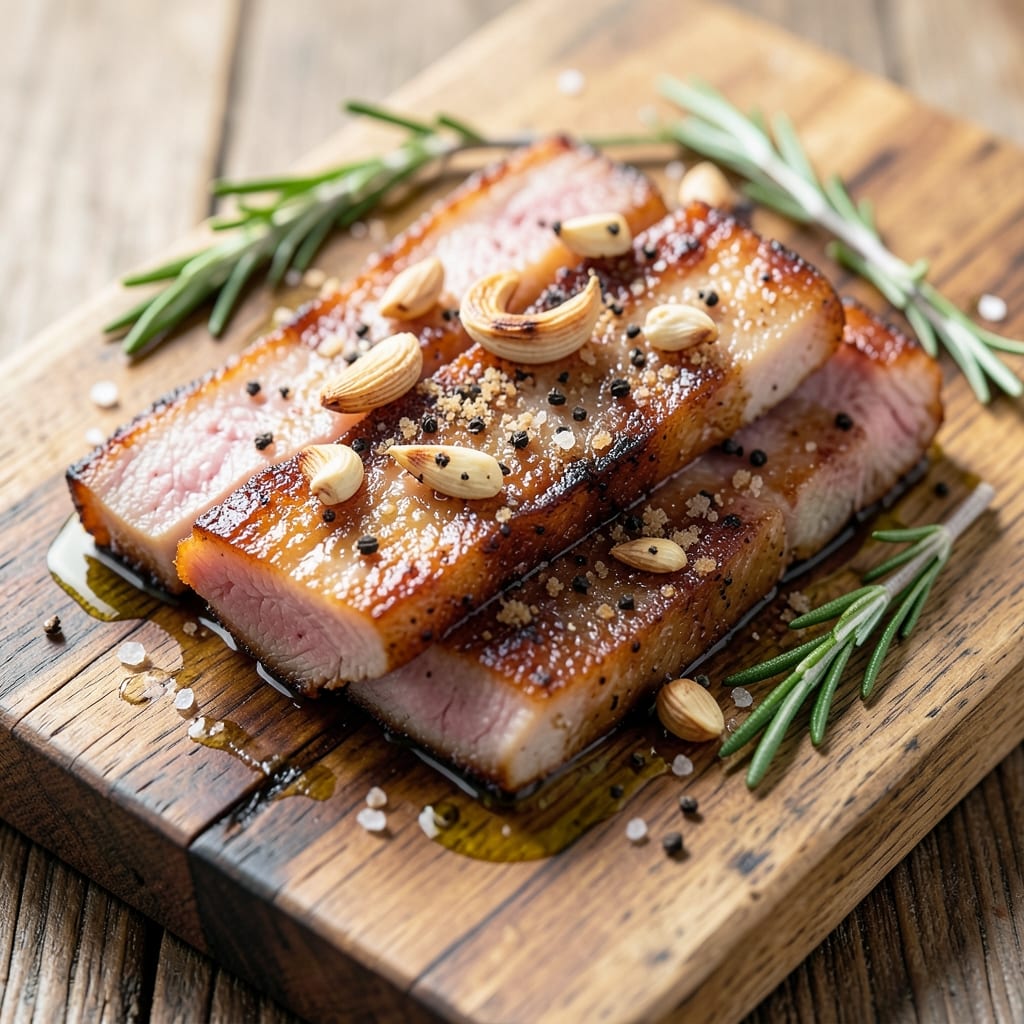
This baked pork belly strips recipe delivers the perfect balance of crispy, crackling bark and tender, melt-in-your-mouth meat—exactly what makes pork belly irresistible. 🔥 After years of perfecting the technique at my pit, I’ve cracked the code for achieving that golden, shatteringly crisp exterior while keeping the inside juicy and rich. The secret lies in scoring, seasoning, and baking at the right temperature to render the fat slowly while creating that coveted bark.
What sets this recipe apart is the simplicity of the method combined with professional results. You’ll start with thick-cut pork belly strips, scored in a diamond pattern to encourage even cooking and crisping. A dry rub of salt, pepper, and a touch of brown sugar enhances the natural flavors while promoting that caramelized crust. Baking at a precise temperature ensures the fat renders just enough to create a luscious, savory sauce in the pan while the strips develop that addictive crunch.
The moment you pull those golden strips from the oven, you’ll understand why this technique has become a staple in my kitchen. Each bite offers a symphony of textures—crispy on the outside, tender and buttery within—and a depth of flavor that’s hard to resist. The rendered fat in the pan transforms into a glossy, aromatic sauce that elevates every strip, making it impossible to stop at just one.
Serve these pork belly strips with a side of pickled vegetables for brightness or steamed jasmine rice to soak up every last bit of that rich, golden sauce. This recipe is designed to impress without the fuss, making it perfect for weeknight dinners or special occasions. Let’s get started on creating pork belly strips that will have everyone asking for seconds.
Ingredients for baked pork belly strips
Thick-cut pork belly plus four key ingredients—salt, sugar, pepper, and rosemary—create restaurant-quality crispy bites at home.
| Ingredient | Amount | Notes |
|---|---|---|
| Pork Belly Strips 🥓 | 1 ½ lb | Thick-cut, scored in diamond pattern |
| Kosher Salt 🧂 | 1 ½ tbsp | Diamond Crystal preferred |
| Freshly Ground Black Pepper 🌶️ | 1 tsp | Coarse grind for texture |
| Light Brown Sugar 🍚 | 1 tbsp | Enhances caramelization |
| Extra-Virgin Olive Oil 🫒 | 1 tbsp | For coating strips |
| Garlic Cloves 🧄 | 2 cloves | Minced for dry rub |
| Fresh Rosemary 🌿 | ¼ cup | Chopped, for aroma |
| Jasmine Rice 🍚 | 1 ½ cups | Uncooked, for serving |
| Water 💧 | 3 cups | For rice cooking |
| Pickled Vegetables 🥬 | 2 cups | Store-bought or homemade |
| Baking Sheet 🍳 | 1 whole | Heavy-duty, for even heat |
| Aluminum Foil 📄 | 1 sheet | For lining pan |
The pork belly makes or breaks this. Ask your butcher for thick-cut strips—about 1/2-inch thick—so they crisp properly. Costco or Whole Foods usually carry pre-scored belly, but if not, score in a diamond pattern yourself (cut 1/4-inch deep). The scoring lets the fat render evenly, creating that coveted crackling bark. Freshness matters too—look for belly that's firm to the touch and has a vibrant pink color, not grayish or slimy. If you're nervous about handling raw pork, gloves are a must, and wash your hands thoroughly after scoring.
No fresh rosemary? Dried works at half the amount, but it won't have the same aroma. Short on brown sugar? White sugar plus a pinch of cinnamon gets you close. The olive oil is non-negotiable for crispiness—don't skip it. For the pickled veggies, Trader Joe's has great pre-pickled mixes, or make your own with quick-pickled cucumbers and carrots. The rice? Jasmine or basmati soaks up that glorious rendered fat sauce. Pro tip: Pat the belly strips dry with paper towels before seasoning—moisture is the enemy of crispiness.
Score the belly and season it right before baking—don't prep too early. The strips go in a 425°F oven for 25 minutes, then you flip them and bake another 15-20 minutes until golden. The rendered fat in the pan is liquid gold—use it to baste the strips halfway through for extra flavor. Store leftovers in the fridge for 3-4 days, but honestly, they're best fresh. Freeze extras for up to 2 months—just reheat in a 350°F oven for 10 minutes to restore crispiness. Serve with rice and pickles to cut through the richness.
Why You'll Love This Recipe
- No-Fuss Prep: I swear by this method—just trim the fat, score the skin, and toss it in the oven. No brining, no fancy marinades, just salt, pepper, and sugar doing their magic while you sip coffee.
- Crispy-Creamy Magic: That caramelized sugar crust? Chef’s kiss. The outside snaps like a potato chip, but inside, it’s tender and juicy—like a hug from your nonna’s kitchen.
- Weeknight Hero: Between us, this is my go-to when I’m too tired to think. Serve it over rice for dinner, toss it in a salad for lunch, or eat it straight with napkins at midnight—no judgment.
- Budget-Friendly Luxury: Pork belly feels fancy, but a few strips stretch across meals. Bake extra, store them in the fridge, and turn them into fried rice or tacos later—same rich flavor, zero waste.
Step-by-step instructions for crispy pork belly strips
Here's how to nail that perfect crispy bark with tender, juicy pork belly every time.
🔥 Step 1: Prep the Pork Belly for Maximum Crisp
Preheat your oven to 425°F—this high heat is key for that crispy bark. While it heats, score the 1.5 lb pork belly strips in a diamond pattern using a sharp knife. Cut through the fat but not all the way through the meat—this creates channels for the fat to render out and the rub to penetrate.
In a small bowl, mix together the 1.5 tbsp kosher salt, 1 tsp freshly ground black pepper, 1 tbsp light brown sugar, 2 minced garlic cloves, and 0.25 cup chopped fresh rosemary. Rub this mixture all over the scored pork belly, pressing it into the cuts. Let it sit at room temperature for 30 minutes—this helps the seasoning stick and the meat cook more evenly.
🍳 Step 2: Sear for Crispy Edges Before Baking
Heat a large oven-safe skillet over medium-high heat. Add the 1 tbsp extra-virgin olive oil and let it get shimmering hot. Place the pork belly strips in the skillet, fat-side down, and sear for 3-4 minutes until the fat starts to render and the edges turn golden brown. Flip and sear the other side for another 3-4 minutes—this step builds flavor and ensures crispy edges.
If you don't have an oven-safe skillet, transfer the seared pork belly to the baking sheet lined with aluminum foil. This foil makes cleanup easier and prevents the pork from sticking. The searing step is non-negotiable—it locks in juices and creates that coveted crispy bark.
🔥 Step 3: Bake to Perfect Doneness
Transfer the skillet (or baking sheet) to the preheated oven and bake for 40-45 minutes until the internal temperature reaches 145°F and the pork belly is fork-tender. You'll notice the fat will render out and pool in the pan—this is normal and actually enhances the flavor. If the fat starts to smoke, reduce the oven temperature to 400°F to prevent burning.
Here's the thing—don't overcook it. The pork belly will continue cooking slightly as it rests. You want it tender but not falling apart. The edges should be deep golden brown with a crispy bark, while the inside remains juicy and tender. If the top isn't brown enough, broil for 2-3 minutes at the end, watching closely to avoid burning.
⏰ Step 4: Rest and Serve with Jasmine Rice
Remove the pork belly from the oven and let it rest on a cutting board for 10 minutes. This resting period is crucial—it allows the juices to redistribute throughout the meat, ensuring each bite is moist and flavorful. Skip this step, and you'll end up with dry, tough pork belly.
While the pork belly rests, cook the 1.5 cups jasmine rice according to package instructions using the 3 cups water. Once the rice is done, fluff it with a fork and serve alongside the sliced pork belly. Arrange the 2 cups pickled vegetables on the side for a tangy contrast to the rich, fatty pork. Slice the pork belly into ½-inch thick strips and serve immediately with the rice and pickled vegetables.
Pro Tips For Making Baked Pork Belly Strips
- CUT STRIPS THIN—NOT TOO THIN: Pork belly strips should be about ½-inch thick—thinner than you’d think. I learned this the hard way: too thick, and the center stays greasy; too thin, and they dry out. A sharp knife and steady hand make all the difference here.
- SALT THE BELLY 24 HOURS EARLY: Generously coat the pork belly in kosher salt and let it sit uncovered in the fridge overnight. This isn’t just about seasoning—it breaks down the fat and renders it beautifully. (Yes, even if you’re impatient like me.)
- START HOT, THEN BAKE LOW: Roast the strips at 425°F for the first 15 minutes to get that initial crust going, then drop to 325°F. After burning three batches, I finally figured out that high heat upfront locks in flavor, while low and slow finishes the job without drying them out.
- USE THE RENDERED FAT: As the pork belly bakes, the fat pools in the pan—don’t pour it out. Brush it back over the strips halfway through baking for extra richness. (Sounds weird, but it works: the fat caramelizes right into the crust.)
Make-ahead tips for this dish
Prep Ahead for Crisp
Score and season the pork belly strips up to 24 hours ahead—store them uncovered on a wire rack in the fridge. This allows the seasoning to penetrate deeply and the surface to dry slightly, which is crucial for that perfect crisp. I do this the night before when I'm prepping for a busy day—I just pull them out, let them sit at room temp for 30 minutes, and they're ready to sear and bake. 🥓
Fat Rendering Trick
For make-ahead baking, place the scored and seasoned strips on a wire rack set inside a baking sheet (no foil). Refrigerate uncovered for 12-24 hours—this renders fat in advance while keeping the meat firm. When ready to cook, pat dry with paper towels, sear, then bake. The fat won't pool as aggressively, but you'll still get that incredible bark. Pro tip: Save the rendered fat in the pan for future cooking—it's liquid gold for roasting veggies or frying eggs. 💛
Freezer Prep Method
Freeze the scored, seasoned strips raw on a parchment-lined tray for 1 hour to prevent sticking, then transfer to a ziplock bag. Thaw overnight in the fridge before cooking—this maintains texture better than quick-thawing. When ready, skip the room temp step and go straight to searing. The cold meat will crisp beautifully, and the fat renders more evenly. I use this method when I'm prepping for a big gathering and need to save time on the actual cooking day. ❄️
Sauce Prep Shortcut
Make the rendered fat sauce ahead of time by baking the pork belly strips as directed, then straining the fat through a fine-mesh sieve into a jar. Store the sauce in the fridge for up to 1 week—it's perfect for basting other proteins or drizzling over rice. I keep a jar in my fridge at all times for quick flavor boosts. When reheating the pork belly strips, brush them with this reserved sauce for extra richness. 🌟
Reheating Leftovers
For best results, reheat pork belly strips in a 350°F oven for 10-12 minutes on a wire rack (no foil) to restore crispiness. Avoid microwaving—they'll turn rubbery. I also recommend brushing with a little olive oil before reheating to help recreate that crispy bark. Store leftovers in an airtight container for up to 4 days, but honestly, they rarely last that long in my house. 🔥
Nutrition facts
Frequently asked questions
Why do you score the pork belly in a diamond pattern?
The diamond pattern creates more surface area for the fat to render out while allowing the seasoning to penetrate deeply. This ensures even cooking and that coveted crispy bark on every strip. Think of it like creating tiny chimneys for the fat to escape—it's the secret to restaurant-quality results at home!
Can I use regular sugar instead of brown sugar?
Yes, but you'll miss out on some of the caramelization that gives the bark its rich color and depth. If using white sugar, add just ¼ tsp cinnamon to mimic the molasses notes in brown sugar. The sugar helps create that perfect balance of sweet and salty flavors that makes these strips irresistible.
What's the best way to tell when the pork belly is done?
Use a meat thermometer to check for an internal temperature of 145°F—this ensures tender meat without overcooking. The edges should be deep golden brown with crispy bark, while the center should still feel slightly springy. If you don't have a thermometer, cut into the thickest part—juices should run clear, not pink.
Can I make these pork belly strips ahead of time?
Score and season the strips 24 hours ahead and refrigerate uncovered on a wire rack. This dries the surface slightly for better crispiness. For make-ahead baking, refrigerate the scored strips for 12-24 hours before cooking. Store leftovers in an airtight container for 4 days—just reheat in a 350°F oven for 10-12 minutes to restore crispiness.
What's the deal with the rendered fat in the pan?
That golden fat is pure flavor magic! It transforms into a luscious sauce that enhances every strip. Save it in a jar for up to 1 week—it's perfect for basting other proteins or drizzling over rice. Don't waste it! Even if you don't use it immediately, it's worth keeping for future cooking adventures.