
Sauces & Condiments
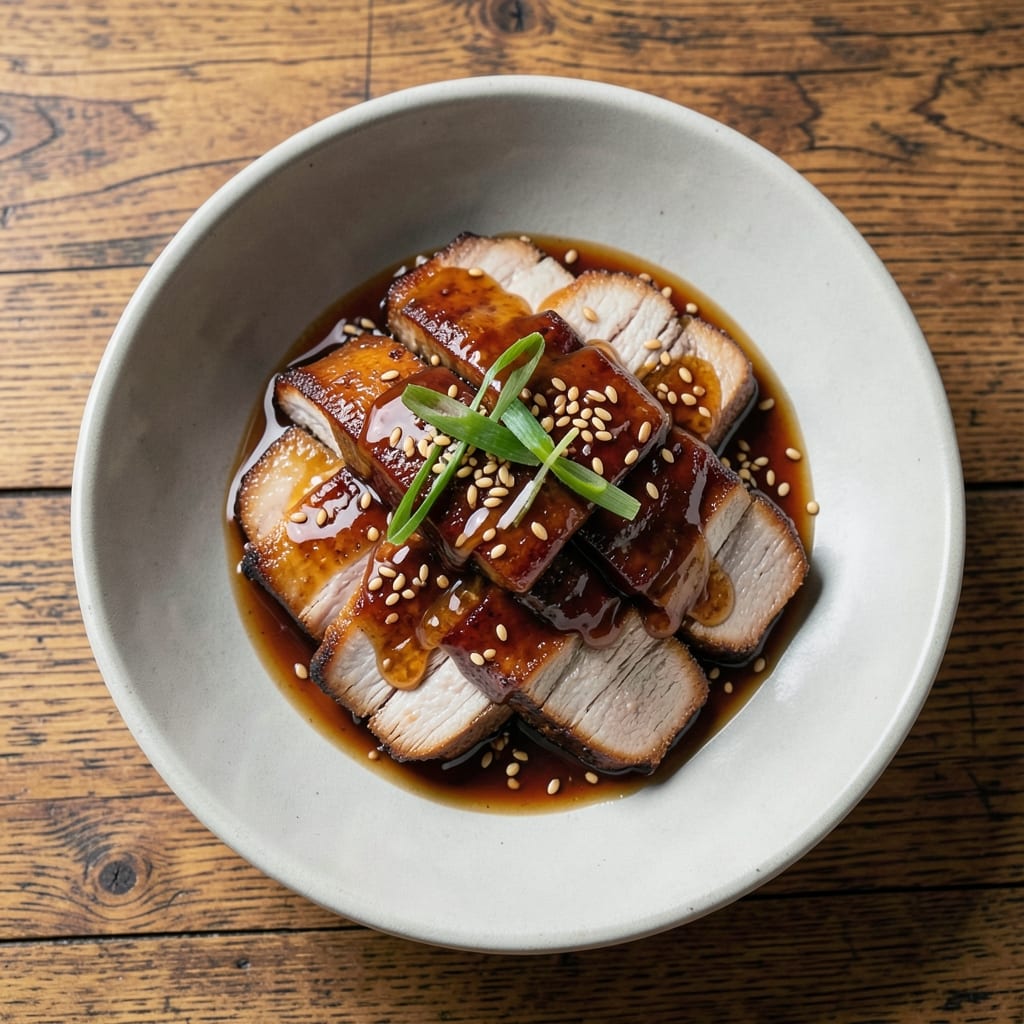
This Asian pork brine recipe transforms tough cuts into melt-in-your-mouth tenderness with a balance of savory, sweet, and umami flavors. After years of perfecting brines for my farm-raised pork, I've developed a method that infuses meat with depth while keeping it juicy—no matter how long you cook it. The secret lies in a 24-hour marinade that breaks down fibers and builds flavor layers through fermented soy, aromatic spices, and a touch of honey.
What sets this recipe apart is the precision of the brine ratio—just enough salt and sugar to tenderize without overwhelming the natural taste of the pork. I use a blend of five-spice powder, ginger, and garlic for that signature Asian warmth, while a splash of rice vinegar adds brightness. This isn't just about making pork tender; it's about creating a restaurant-quality experience at home that rivals any Asian eatery.
The result? Pork that's so tender it practically falls apart at the touch, with a glossy exterior and flavors that sing with every bite. Whether you're braising pork belly for crispy edges, roasting a tenderloin for perfect medium, or stir-frying slices for quick weeknight meals, this brine ensures consistent, foolproof results. The technique works equally well for ribs, shoulder cuts, or even pork tenderloin—just adjust the cooking method to match your preferred texture.
For those who love to experiment, this brine plays beautifully with different cooking styles. Try it with a quick sear and finish for stir-fry, or slow-braise for melt-in-your-mouth pulled pork. The beauty of this method is its versatility—once you master the brine, the possibilities are endless. Let's get started on transforming your pork game forever.
Ingredients for asian pork brine
Twelve ingredients to transform tough pork into restaurant-quality melt-in-your-mouth perfection.
| Ingredient | Amount | Notes |
|---|---|---|
| Pork Shoulder (or Pork Butt) 🍖 | 2 lb | Bone-in preferred for flavor |
| Kosher Salt 🧂 | ½ cup | Diamond Crystal preferred |
| Brown Sugar 🍯 | ¼ cup | Light or dark variety |
| Light Soy Sauce 🥢 | ½ cup | Kikkoman preferred for balance |
| Rice Vinegar 🍶 | ¼ cup | Seasoned preferred for depth |
| Honey 🍯 | ¼ cup | Wildflower preferred for floral notes |
| Five-Spice Powder 🌶️ | 2 tbsp | Freshly toasted for intensity |
| Fresh Ginger 🧄 | 2 tbsp | Grated, not powdered |
| Garlic Cloves 🧄 | 6 cloves | Smashed for maximum infusion |
| Sesame Oil 🫒 | 1 tbsp | Toasted for nutty aroma |
| Fresh Cilantro 🌿 | ¼ cup | Chopped, for garnish |
| Green Onions 🧅 | 4 whole | Thinly sliced, for garnish |
| Water 💧 | 2 cups | Filtered preferred for clarity |
The pork cut matters—pork shoulder or butt gives you that signature fatty marbling that stays juicy. Whole Foods or your local butcher shop are best for quality cuts, but any grocery store carries pork shoulder. Look for pieces with good marbling—that white fat is flavor gold. If you're using pre-cut pieces, trim any excess fat to about 1/4-inch thickness for even cooking. The kosher salt is non-negotiable here—Diamond Crystal dissolves perfectly, but any kosher salt works. For the soy sauce, Kikkoman is my go-to—it's got that perfect balance of salt and umami without being too heavy.
No brown sugar? White sugar at the same amount works, but you'll lose some of that caramel depth. Running out of rice vinegar? Apple cider vinegar at half the amount gets you close, though it'll be slightly tangier. Fresh ginger is ideal, but powdered at half the amount will work in a pinch. The five-spice powder can be tricky—look for authentic blends at Asian markets—they usually have better quality than the grocery store versions. Sesame oil is a flavor bomb, but if you're avoiding it, toasted peanut oil at half the amount adds a similar richness. The honey? Any variety works, but wildflower has the most complex flavor—don't use that cheap grocery store stuff.
This brine is designed to work its magic over 24 hours, but you can do it in as little as 12 for quick meals. Store the pork in a glass container or resealable bag—just make sure it's fully submerged. The brine keeps in the fridge for up to 5 days if you want to prep ahead. Once cooked, the pork reheats beautifully—slow oven at 300°F for 10 minutes keeps it juicy. Leftovers? Shred and freeze for up to 3 months—perfect for quick stir-fries or tacos later.
Why You'll Love This Recipe
- No-Fuss Marinade: I just toss the pork in a bag with salt, sugar, soy, and vinegar—no chopping, no measuring cups. Honestly, five minutes of hands-off work, and the flavor builds overnight while I sleep.
- Sweet-Savory Magic: That brown sugar and soy combo? It caramelizes into this addictive crust, while the vinegar keeps it bright. Between us, the first bite makes me forget about takeout.
- Weeknight Workhorse: Use it for pulled pork sandwiches, stir-fries, or even cold cuts. I’ll be real: my lazy Sunday lunch is just this pork sliced thin over rice with a fried egg. No stress, all flavor.
- Budget-Friendly Feast: Pork shoulder stretches for days—roast it once, eat it three ways. The brine costs pennies, and the leftovers? Better than anything I’ve bought pre-made. My wallet thanks me.
Step-by-step instructions for Asian pork brine recipe
Here's how to transform tough pork into melt-in-your-mouth perfection through precise brining.
Prepare the Brine Mixture
In a large bowl, combine the 2 cups water, 0.5 cup kosher salt, 0.25 cup brown sugar, 0.5 cup light soy sauce, 0.25 cup rice vinegar, and 0.25 cup honey. Stir vigorously until the salt and sugar dissolve completely—the mixture should look like a thick, aromatic syrup. This balance of salt and sweetener creates the perfect osmotic environment for tenderizing while building deep flavor.
Next, add the 2 tablespoons five-spice powder, 2 tablespoons freshly grated ginger, and 6 smashed garlic cloves. The five-spice adds complexity while the ginger and garlic infuse their bright, pungent notes. Stir well to distribute these aromatic elements evenly throughout the brine. Let the mixture sit at room temperature for 10 minutes to allow the spices to bloom and release their essential oils—this ensures maximum flavor penetration into the pork.
Infuse the Brine with Sesame Oil
Remove the bowl from the counter and carefully pour in the 1 tablespoon toasted sesame oil. The oil should float on top initially, but gentle stirring will emulsify it into the brine, creating a silky, aromatic base. This step is crucial—sesame oil carries nutty depth that complements the other flavors and adds a luxurious finish to the final dish.
Here's the thing—don't rush this infusion. Let the mixture sit for another 5 minutes while you prepare the pork. This resting period allows the sesame oil to fully integrate, preventing any separation later. The result should be a glossy, fragrant liquid with a rich aroma that makes your kitchen smell like an Asian street food stall.
Submerge the Pork in the Brine
Place the 2 lb pork shoulder in a large resealable plastic bag or non-reactive container. Pour the prepared brine over the pork, ensuring it's completely submerged. If using a bag, seal it tightly, squeezing out all air bubbles—this creates a vacuum seal that maximizes surface contact between the meat and brine. For containers, weigh down the pork with a plate to keep it fully immersed.
Refrigerate the pork for 24 hours, turning the bag or container every 8 hours to ensure even exposure to the brine. This extended contact time is what transforms tough pork into tender, juicy perfection. After 24 hours, the pork will have absorbed enough of the flavorful liquid to develop that signature Asian-inspired sweet-savory profile while becoming noticeably more pliable to the touch.
Rinse and Prepare for Cooking
After brining, remove the pork from the refrigerator and rinse it thoroughly under cold water for 30 seconds. This step removes excess surface brine that could prevent proper browning during cooking. Pat the pork dry with paper towels—this drying step is critical for developing a crispy exterior when you eventually cook it.
At this point, you can either proceed directly to cooking or refrigerate the rinsed pork for up to 24 additional hours for even better flavor development. The pork is now primed for whatever cooking method you choose—whether it's slow braising, grilling, or stir-frying. The key is to maintain that high heat at the end to create a caramelized crust that contrasts beautifully with the tender interior.
Pro Tips For Making Asian Pork Brine
- Trim the Fat First: Cut away the thickest layer of fat from the pork shoulder before brining—it doesn’t need it, and it’ll crisp up better when you cook it later. (Yes, even if it feels wasteful; trust me, the texture makes up for it.) ---
- Use Coarse Salt: Skip the fine kosher salt—it dissolves too fast and leaves your pork unevenly seasoned. Go for a coarse or flaky salt so it clings to the meat and penetrates deeper. (I learned this the hard way after a batch tasted bland in spots.) ---
- Brine Overnight, Not Rush: Give the pork at least 12 hours in the brine—any less and the seasoning won’t sink in properly. I used to cut it to 6 hours, and the flavor was always just… there, not deep. (Your patience will pay off.) ---
- Balance the Vinegar: Rice vinegar adds tang, but too much will make the pork taste sour. For every cup of soy sauce in your brine, use just 2 tablespoons of vinegar—adjust to taste, but don’t overdo it. (I once ruined a batch by doubling it; don’t ask how I know.)
Make-ahead tips for this dish
Brining Timeline
Plan your brining like a pro by starting the process 24 hours before cooking. I recommend setting a timer on your phone for every 8 hours to gently massage the pork in its bag or container—this ensures even flavor distribution. The longer the brine time (up to 48 hours), the more tender the pork becomes, but 24 hours is the sweet spot for perfect balance. Pro tip: If you're short on time, a 12-hour brine still delivers great results, though the texture won't be as luxurious. 💪
Storage Solutions
Use a quart-sized resealable bag for the pork and brine—it's the most space-efficient option and creates a tight seal. For larger cuts, a glass baking dish works well, but place a plate on top to weigh down the pork. Store everything in the coldest part of your fridge (usually the bottom shelf) where temperatures stay most consistent. I've even brined pork in airtight glass jars when I'm prepping for a crowd—just leave 1 inch of headspace for expansion. ❄️
Freezer Prep
This brine works beautifully for meal prep—freeze the brined pork for up to 3 months before cooking. After brining for 24 hours, rinse and pat dry, then wrap the pork tightly in plastic wrap followed by a layer of aluminum foil. Label with the date and cooking method (e.g., "Braise" or "Grill"). When ready to cook, thaw overnight in the fridge and proceed with your chosen method. The texture remains perfect because the brine's tenderizing properties work even during freezing. 🧊
Batch Cooking
Double the recipe and brine two 2 lb pork shoulders simultaneously—they fit perfectly in a standard gallon-sized resealable bag. This is my go-to strategy for game days or family gatherings. Cook one portion immediately and freeze the second for future meals. For even more efficiency, brine two different cuts (like pork shoulder and tenderloin) in separate bags—they'll both benefit from the same flavor profile but develop different textures when cooked. 🍖
Reheating Leftovers
Cooked brined pork reheats beautifully in the oven to maintain moisture. Slice or shred the pork, then place it in a 350°F oven for 10-15 minutes with a splash of water or broth to prevent drying. For quick meals, microwave on 50% power for 1-2 minutes per cup, stirring halfway. I often reheat leftovers for pork fried rice or banh mi sandwiches—the flavors only get better with time. 🍚
Flavor Boosting
After brining, enhance the flavor by letting the pork sit uncovered in the fridge for 1-2 hours before cooking. This "drying" step concentrates the surface flavors and creates a better sear. For extra depth, add 1 tbsp of the leftover brine to your cooking liquid (like a braising pan or stir-fry) after removing the pork. I've even used the strained brine to baste the pork during cooking—it's like liquid gold for flavor. 💛
Nutrition facts
Frequently asked questions
Can I use this brine on other cuts of pork besides shoulder?
This brine works beautifully on pork tenderloin, ribs, or even pork belly. For tenderloin, reduce brining to 12 hours to prevent over-tenderizing, while ribs and belly can handle the full 24 hours. The key is adjusting cooking times—tenderloin needs quick high-heat methods, while fatty cuts like belly shine with slow braising.
What if I don't have five-spice powder?
No problem! Mix 1 tsp cinnamon, 1 tsp fennel seeds, 1 tsp star anise, ½ tsp cloves, and ½ tsp black pepper for a homemade blend. If you're missing multiple spices, just skip it—the soy, ginger, and garlic will still deliver amazing flavor. For a quick shortcut, use 1 tsp ground coriander plus ½ tsp cinnamon as a substitute.
How do I know when the pork is fully brined?
After 24 hours, the pork should feel noticeably softer and more pliable when pressed gently. The surface will also have a slight gloss from the absorbed brine. If you cut a small test piece, it should pull apart easily with minimal resistance. For visual confirmation, the brine liquid should appear cloudy with dissolved spices—this means maximum flavor transfer.
Can I reuse the leftover brine?
Yes! Strain the used brine through a fine-mesh sieve after removing the pork, then store it in an airtight container in the fridge for up to 5 days. Use it as a marinade for tofu, chicken, or vegetables, or reduce it by half for a flavorful sauce. The salt and sugar concentrations will be lower, but it'll still pack serious umami punch. Perfect for quick stir-fries or as a baste during grilling.
Why does my brined pork turn out dry?
Dryness usually happens when you skip the 30-second rinse before cooking or don't pat the pork thoroughly dry afterward. The residual brine prevents proper browning, which means less moisture retention. Also, overcooking (especially in the oven) is a common mistake—pork shoulder should reach 195°F internal temp for pull-apart tenderness, not 205°F. For best results, always rest the meat 15-20 minutes after cooking.